Introduction
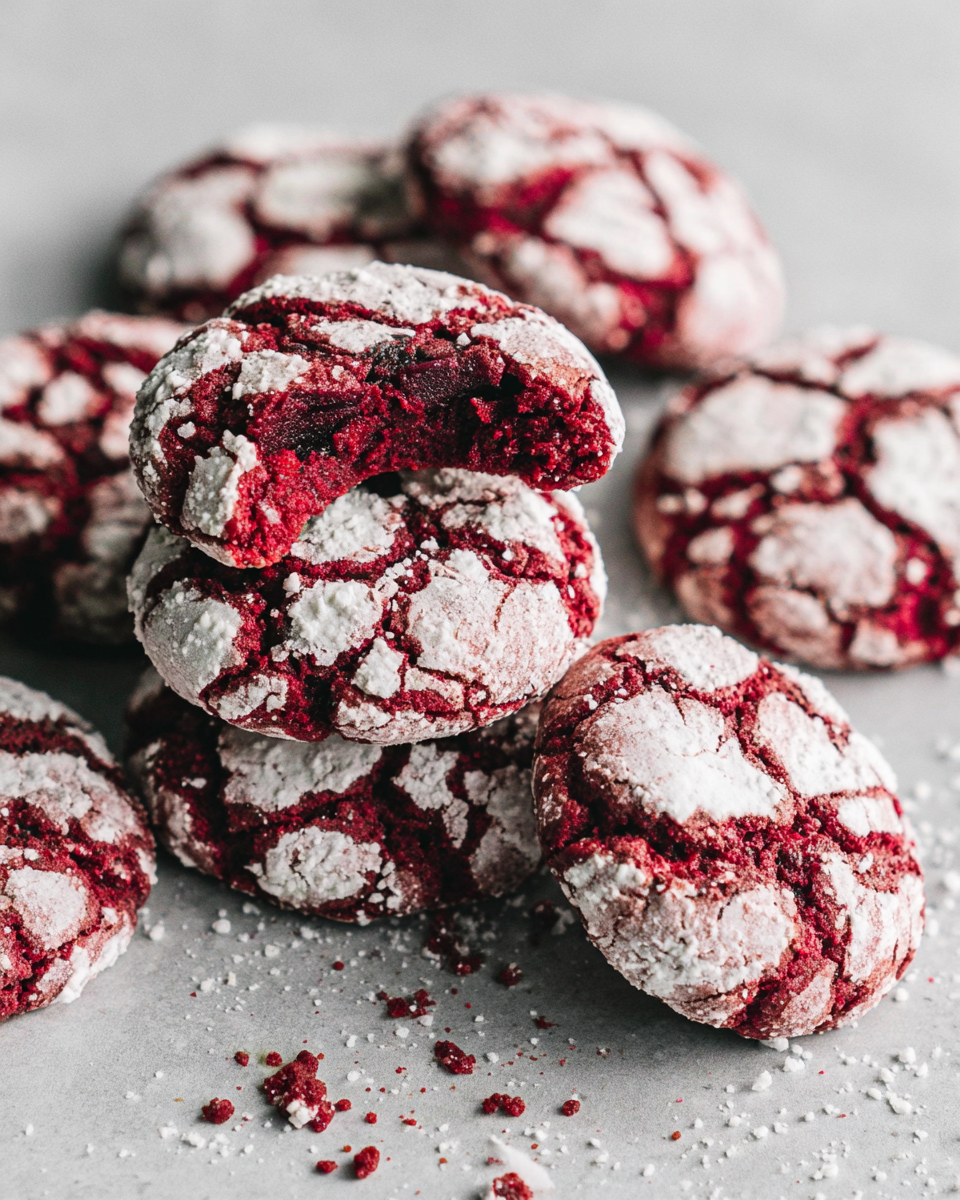
As the holidays approach, few treats capture the spirit of celebration quite like red velvet crinkle cookies. With their rich color and fudgy texture, these cookies are not only visually stunning but also an absolute delight to eat. Perfect for sharing at gatherings or enjoying during a cozy evening at home, they embody the essence of festive baking.
The combination of cocoa and buttermilk in these cookies creates a unique flavor profile that pairs beautifully with the signature red hue. The crinkly tops and soft centers make each bite a luxurious experience. Plus, these cookies are easy to whip up, making them an ideal choice for both novice and seasoned bakers.
Ingredients
- 2 cups all-purpose flour
Flour provides the structure and base for the cookies. Using all-purpose flour achieves a balance between softness and sturdiness, allowing the cookies to remain chewy. - 1/2 cup unsweetened cocoa powder
Cocoa powder not only adds a rich chocolate flavor but also contributes to the cookies' deep red color, enhancing the overall aesthetic and taste. - 1 teaspoon baking powder
Baking powder acts as a leavening agent, helping the cookies rise slightly during baking and giving them a light, fluffy texture. - 1/2 teaspoon salt
Salt enhances the overall flavor of the cookies, balancing the sweetness and intensifying the chocolate notes. - 1/2 cup unsalted butter, softened
Butter adds richness and moisture, creating a tender texture. Beaten into the sugars, it helps aerate the dough for a lighter cookie. - 1 cup granulated sugar
Granulated sugar sweetens the cookies and contributes to their chewy texture. It also caramelizes slightly during baking, adding depth of flavor. - 1/4 cup brown sugar
Brown sugar, with its hint of molasses, adds moisture and a subtle chewiness while enhancing the overall flavor with its caramel notes. - 2 large eggs
Eggs bind the ingredients together and help with leavening. They add richness and contribute to the cookies' fudgy texture. - 2 teaspoons vanilla extract
Vanilla extract infuses a warm, sweet aroma, complementing the chocolate and buttermilk flavors beautifully. - 1 tablespoon red food coloring
Food coloring is essential for achieving that classic vibrant red hue. It enhances the visual appeal of the cookies. - 1/2 cup powdered sugar (for coating)
Powdered sugar creates the signature snowy crinkle effect on the cookie surface as they bake, contributing to their festive appearance.
Directions & Preparation
Step 1: Preheat your oven to 350°F (175°C).
Preheating the oven ensures that the cookies bake evenly and rise properly. It’s important for achieving the right texture. An oven thermometer can help verify the correct temperature, as not all ovens are calibrated the same.
Step 2: In a medium bowl, whisk together flour, cocoa powder, baking powder, and salt. Set aside.
Whisking these dry ingredients together ensures they are evenly distributed, preventing any pockets of flour or cocoa in the dough. This step helps achieve uniform texture and flavor.
Step 3: In a large bowl, beat the softened butter with granulated sugar and brown sugar until light and fluffy. This usually takes about 3-5 minutes.
Creaming the butter and sugars incorporates air into the mixture, which is critical for creating a light and tender cookie. The texture should be pale and fluffy, indicating sufficient aeration.
Step 4: Add the eggs, one at a time, mixing well after each addition. Stir in the vanilla extract and red food coloring until fully incorporated.
Adding eggs one at a time helps maintain the emulsion and ensures that each egg is fully integrated before adding the next. The red food coloring should be mixed thoroughly to achieve an even color.
Step 5: Gradually add the dry ingredients to the wet ingredients, mixing just until combined. Do not over-mix.
Over-mixing can lead to tough cookies due to gluten development. Mix until you see no streaks of flour to keep the texture tender and fudgy.
Step 6: Cover the dough and refrigerate for at least 30 minutes—this helps solidify the butter again and enhances flavors.
Chilling the dough prevents the cookies from spreading too much during baking. It also allows the flavors to meld, resulting in a more robust taste.
Step 7: Scoop the dough and roll it into 1-inch balls, then coat each ball generously in powdered sugar.
Rolling the dough into balls ensures even baking. The powdered sugar will create the signature crinkle effect as the cookies bake, so give each cookie a nice coat for a festive look.
Step 8: Place the coated cookie balls on a parchment-lined baking sheet, spaced about 2 inches apart.
Spacing the cookies properly is key to allowing them to spread without merging together. The parchment paper helps with even baking and prevents sticking.
Step 9: Bake for 10-12 minutes, or until the edges are set but the centers still look slightly soft.
Baking until the edges are set ensures the cookies hold their shape, while the slightly soft centers will continue to cook upon cooling, maintaining a fudgy texture.
Step 10: Remove from the oven and let cool on the baking sheet for 5 minutes before transferring to a wire rack to cool completely.
Cooling the cookies on the baking sheet for a few minutes allows them to firm up before transferring. This helps prevent them from falling apart and ensures a nice chewy texture.

The Signature Crinkle Effect
Achieving that stunning crinkle effect is key to the charm of red velvet crinkle cookies. The combination of powdered sugar coating and the way the dough spreads during baking creates beautiful fissures on the surface. This visual appeal, combined with the deep red color, makes these cookies a striking addition to any dessert table. Ensure you use enough powdered sugar when rolling the dough, as it’s crucial for that sought-after finish.
Flavorful Variations
While the classic red velvet flavor is delightful on its own, the cookies can be enhanced with various mix-ins. Consider adding white chocolate chips, or a touch of espresso powder to deepen the chocolate flavor. You could also experiment with different extracts, like almond or peppermint, to introduce seasonal notes. These variations keep the recipe versatile, allowing for personal touches that cater to individual preferences.
Presenting Your Cookies
The presentation of your red velvet crinkle cookies can elevate their festive appeal. Stack them on a decorative plate, or gift them in a clear cellophane bag tied with a ribbon for a charming homemade gift. Adding a tag with baking notes or a personal message can make the gift even more special. Their vibrant color and unique texture are sure to impress, making them a delightful treat for any occasion.
FAQs
What can I do if my cookie dough is too thick?
If your dough is too thick to scoop easily, try adding a tablespoon of milk or buttermilk to loosen it slightly. Mix gently until it reaches a workable consistency.
What if my cookies don't crinkle after baking?
If your cookies don’t crinkle, it may be due to not enough powdered sugar or overmixing the dough. Ensure a good coating of powdered sugar, and handle the dough minimally to keep it tender.
Can I use liquid food coloring instead of gel for a deeper red color?
Yes, liquid food coloring can be used, but you'll likely need more to achieve the same depth of color. Be cautious with the quantity to maintain the cookie's texture.
What happens if I overbake the cookies?
Overbaking can lead to dry cookies, losing that desirable fudgy texture. To prevent this, keep an eye on them in the last few minutes and remove them as soon as the edges firm up.
Can I add nuts or chocolate chips to the dough?
Absolutely! Adding nuts or chocolate chips can enhance the taste and texture, making the cookies even more delightful. Just fold them in gently after combining the dry and wet ingredients.
How do I ensure my cookies stay soft after baking?
To maintain softness, avoid overbaking and store the cookies in an airtight container once they’re completely cooled. You can also add a slice of bread to the container to help retain moisture.
Conclusion
Red velvet crinkle cookies are more than just a festive treat; they embody the warmth of the holiday season. Their fudgy texture and vibrant color make them the perfect choice for gatherings or cozy nights at home.
With a few simple ingredients and steps, these delightful cookies can become a cherished tradition for you and your loved ones. So, tie on your apron, gather your ingredients, and enjoy the joyful process of baking these delicious cookies.
Recipe Card
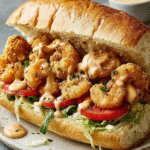
Delicious Shrimp Po’ Boy Sandwich Recipe for Home Chefs
Ingredients
- 1 pound large shrimp peeled and deveined
- 1 cup buttermilk
- 1 cup all-purpose flour
- 1 cup cornmeal
- 1 teaspoon paprika
- 1 teaspoon garlic powder
- 1 teaspoon cayenne pepper
- Salt and black pepper to taste
- Vegetable oil for frying
- 4 hoagie rolls or French bread
- Lettuce shredded
- Tomato sliced
- Remoulade sauce for serving
Instructions
- Marinate the shrimp in buttermilk.
- Prepare the breading mixture.
- Heat oil in a deep skillet.
- Bread the shrimp.
- Fry the shrimp in batches.
- Prepare the hoagie rolls.
- Assemble the sandwich.
- Serve immediately.
Notes
Additional serving suggestions: pair with a crisp salad, garlic bread, or roasted seasonal vegetables for balance.
For make-ahead, prep components separately and assemble just before heating to preserve texture.
Taste and adjust with acid (lemon/vinegar) and salt right at the end to wake up flavors.


