Introduction
As the holiday season approaches, the warmth of the oven adds a special coziness to our homes. One of the most delightful ways to usher in the festive spirit is by baking a traditional Christmas bread. Its rich aroma fills the air, creating an inviting atmosphere that brings family and friends together.
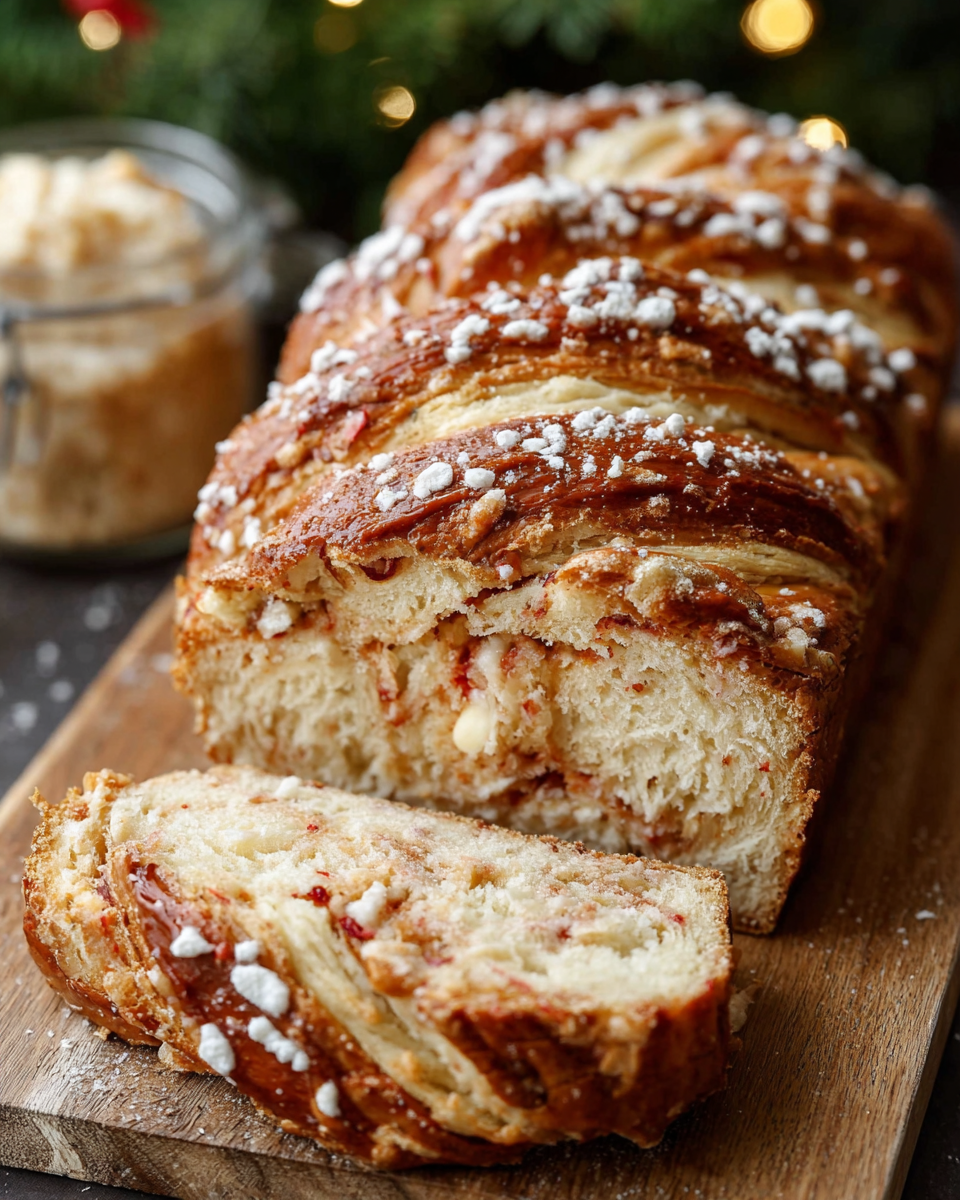
This beloved recipe is more than just a treat; it embodies the essence of celebration and togetherness. With its beautiful crust and soft, flavorful interior, festive Christmas bread serves as a centerpiece on the holiday table, inviting everyone to partake in a piece of homemade joy.
Whether braided, shaped, or adorned with seasonal spices and fruit, this bread has the incredible ability to make any gathering feel more special. Embrace the opportunity to create this festive treat that truly captures the heart of Christmas.
Ingredients
- 4 cups all-purpose flour
The foundation of the bread, all-purpose flour provides structure and strength. It enables the dough to rise, creating that lovely, fluffy texture we all look for in bread. - 1 packet (2 ¼ tsp) active dry yeast
Yeast is crucial for fermentation, which gives bread its rise and airy quality. It consumes the sugars in the dough and produces carbon dioxide, causing the dough to expand. - ½ cup sugar
Sugar not only sweetens the bread, but it also helps with the browning of the crust during baking. It contributes to a tender texture and enhances flavors, creating a delightful contrast with the spiced elements. - ½ cup milk, warmed
Warmed milk activates the yeast, making the fermentation process more efficient. It also adds moisture and richness to the bread, resulting in a soft crumb. - ⅓ cup unsalted butter, melted
Melted butter enriches the dough, lending flavor and tenderness. It helps create a soft texture and adds a delightful richness that enhances every bite. - 2 large eggs
Eggs contribute to the structure and binding of the dough. They also add moisture and flavor, helping to create a rich, satisfying bread. - 1 tsp vanilla extract
Vanilla enhances the overall flavor profile of the bread, adding a warm, aromatic quality that complements the spices and fruits typically used in festive baking. - 1 tsp ground cinnamon
Cinnamon brings warmth and depth to the bread, evoking the cozy aromas of the holiday season. It pairs wonderfully with other spices like nutmeg or allspice for a festive touch. - ½ tsp nutmeg
Nutmeg adds a fragrant, slightly sweet note that, when combined with cinnamon, creates a classic holiday flavor. It enhances the overall sensory experience of the bread. - 1 cup mixed dried fruits (raisins, cranberries, etc.)
Dried fruits add bursts of sweetness and texture which balance the bread’s flavors. They create a beautiful contrast with the spices, making each slice a festive delight.
Directions & Preparation
Step 1: Activate the yeast.
In a small bowl, combine the warm milk and sugar, then sprinkle the yeast over the top. Let it sit for about 5-10 minutes until frothy. This step is critical as it ensures the yeast is alive and ready to make the dough rise. If the mixture doesn’t froth, your yeast may not be active and it’s best to start over to ensure a successful bread.
Step 2: Combine dry ingredients.
In a large mixing bowl, whisk together the flour, cinnamon, nutmeg, and a pinch of salt. Mixing the dry ingredients first ensures that the spices are evenly distributed throughout the flour, which contributes to a more balanced flavor in the final bread. It also provides a clear base upon which to add the wet ingredients.
Step 3: Mix wet ingredients.
In another bowl, whisk together the melted butter, eggs, vanilla extract, and the activated yeast mixture. Combining these creates a uniform mixture that will be added to the flour, ensuring that each ingredient is well incorporated. Pay attention to the temperature of the butter—it should be warm but not hot to avoid cooking the eggs.
Step 4: Combine wet and dry mixtures.
Make a well in the center of the dry ingredients and pour in the wet mixture. Using a spatula or wooden spoon, mix until a shaggy dough forms. This step is essential as it begins the process of developing the dough’s texture. Avoid overmixing at this stage; a rough dough will yield a softer bread.
Step 5: Knead the dough.
Turn the dough onto a lightly floured surface and knead for about 8-10 minutes until it’s smooth and elastic. Kneading strengthens the gluten structure, which is vital for creating a light and airy bread. The dough should be slightly tacky but not stick to your hands. You can test if it’s done by stretching a piece; if it holds without tearing, you’re ready to rise.
Step 6: First rise.
Place the kneaded dough in a greased bowl, cover it with a damp cloth, and set it in a warm place for about 1-2 hours, or until doubled in size. This step is crucial for developing flavor and texture, as the yeast ferments and produces gases that make the bread light and fluffy. Be patient here; the longer the rise, the more flavor your bread will develop!
Step 7: Shape the dough.
Once risen, gently punch down the dough to release excess gases. Turn it out onto a floured surface and shape it according to your desired style—whether a braided loaf or a simple round. This step helps redistribute the yeast and sugar, ensuring an even texture and flavor throughout the bread. Don’t rush this; a well-shaped dough looks and tastes better.
Step 8: Second rise.
Place the shaped dough onto a baking tray lined with parchment paper. Cover it loosely with a cloth and let it rise for another 30-45 minutes. This secondary rise ensures a light and fluffy interior. The dough should spring back quickly when gently pressed. If it doesn't, it may need more time in the warm environment.
Step 9: Preheat the oven.
While the dough rises, preheat your oven to 350°F (175°C). Preheating ensures that the bread starts baking immediately upon entering the oven, promoting even cooking and proper development of the crust. A hot oven encourages the bread to rise even more, giving it that enticing golden-brown color.
Step 10: Bake the bread.
Once the dough has risen adequately, bake it in the preheated oven for about 25-30 minutes, or until golden brown and sounds hollow when tapped. This step is where the magic happens; the heat activates the yeast and creates a lovely crust. If the top browns too quickly, cover it loosely with foil.
Step 11: Cool and serve.
After baking, let the bread cool on a wire rack for at least 15 minutes before slicing. Cooling allows the interior to set, preventing it from becoming gummy. Serve it warm, toasted with butter or as a part of your festive spread for a warm and inviting centerpiece.

Enhancing Flavor with Special Add-Ins
Consider infusing your festive Christmas bread with additional flavors by adding nuts, such as walnuts or almonds, or a hint of orange zest for a citrusy brightness. You can also incorporate different dried fruits like apricots or figs to create unique flavor profiles. These additions not only enhance taste but also introduce interesting textures that elevate your bread experience.
Decoration Ideas for a Festive Touch
Once baked, the bread can be further adorned to celebrate the season. Drizzle a simple icing made from powdered sugar and milk over the top for a beautiful finish, or sprinkle with coarse sugar before baking for extra sparkle. Fresh herbs like rosemary or thyme can also make appealing edible decorations, highlighting the natural beauty of the bread.
Pairing Recommendations for Holiday Gatherings
This festive bread pairs beautifully with a variety of holiday dishes. Serve it alongside a rich cheese platter or alongside hearty soups for a comforting meal. For breakfast or brunch, consider plating it with spiced butter or jams, making it a delightful offering for holiday gatherings. The versatility of this bread makes it an absolute must for any festive table.
FAQs
What if my dough is too sticky?
If your dough is overly sticky during kneading, gradually add small amounts of flour until it reaches a manageable consistency. Avoid adding too much flour at once to ensure the final bread remains tender.
Can I substitute the dried fruits?
Yes, you can use any combination of dried fruits that you love or have on hand. Just be mindful of the moisture content; adjust the amount if using particularly juicy fruits like fresh figs.
What should I do if the bread doesn't rise well?
If your bread fails to rise, it may be due to inactive yeast or a cold environment. Make sure your yeast is fresh and consider placing the dough in a warmer space to encourage better fermentation.
Why is my bread too dense?
A dense bread could be due to not enough kneading, which is essential for gluten development, or it may have been under-proofed. Allow adequate rising times for the best texture.
Can I double the recipe for a larger gathering?
Absolutely! This recipe is easily scalable. Just ensure you have enough space for the dough to rise, and consider using two baking sheets if necessary.
What if I want a sweeter bread?
If you desire a sweeter loaf, feel free to increase the sugar by a couple of tablespoons. Just keep in mind it may require minor adjustments in the liquid to achieve the desired dough consistency.
Conclusion
Baking festive Christmas bread is a rewarding experience that elevates holiday gatherings with warmth and flavor. The delightful aromas wafting through your home create a sense of nostalgia and connection with loved ones around the table.
As you slice into this beautifully baked bread, it becomes much more than just a treat; it symbolizes sharing, joy, and celebration. Embrace the joyful act of baking and make this festive bread a cherished tradition in your holiday celebrations.
Recipe Card
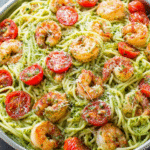
Pesto Shrimp Linguine That Will Impress Your Guests
Ingredients
- 8 ounces linguine
- 1 pound shrimp peeled and deveined
- 1 cup fresh basil pesto
- 2 tablespoons olive oil
- 2 cloves garlic minced
- 1/2 teaspoon red pepper flakes
- Salt and pepper to taste
- Parmesan cheese for garnish
Instructions
- Cook the linguine according to package instructions.
- While the pasta cooks, heat olive oil in a large skillet.
- Add minced garlic and red pepper flakes to the skillet.
- Add the shrimp to the skillet and cook until they are pink and opaque.
- Drain the linguine and add it to the skillet with the shrimp.
- Stir in the pesto, mixing well to combine.
- Season with salt and pepper to taste and toss to combine.
- Serve immediately, garnished with Parmesan cheese.
Notes
Additional serving suggestions: pair with a crisp salad, garlic bread, or roasted seasonal vegetables for balance.
For make-ahead, prep components separately and assemble just before heating to preserve texture.
Taste and adjust with acid (lemon/vinegar) and salt right at the end to wake up flavors.


