Introduction
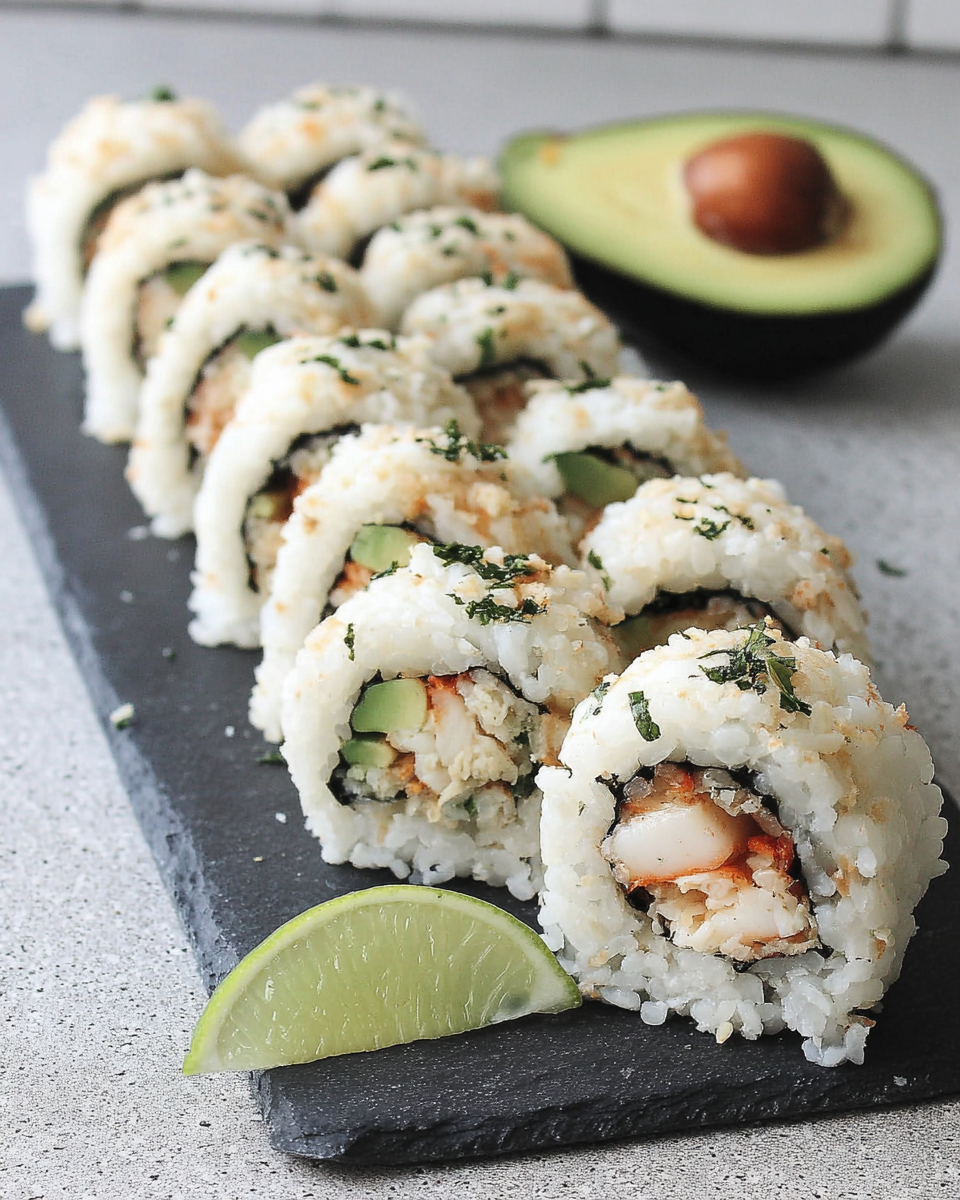
If you've ever taken a bite of a California Crunch Roll, you already know it's an irresistible combination of flavors and textures. This popular sushi choice features the delicious contrast between creaminess, crunch, and umami, all elegantly wrapped in rice and seaweed.
Making this delightful sushi at home is not only possible but also a fun experience that elevates any meal. With simple, fresh ingredients, you can create a satisfying dish that impresses family and friends alike. This article will guide you through the process.
Ingredients
- 2 cups sushi rice
Sushi rice is sticky and short-grained, providing the perfect texture and flavor for sushi. It creates that essential base when forming the rolls, allowing them to hold together beautifully when rolled. - 2 1/2 cups water
Water is needed to cook the sushi rice properly. The right water-to-rice ratio is crucial, as it ensures the rice becomes tender and sticky, essential for forming the rolls effectively. - 1/3 cup rice vinegar
Rice vinegar adds the signature tangy flavor to the sushi rice. It also helps to enhance the overall taste and aids in achieving the right texture by adding moisture without making the rice soggy. - 2 tablespoons sugar
Sugar balances the acidity of the rice vinegar, contributing to a subtle sweetness. This sweetness enhances the overall flavor profile of the sushi, making it more enjoyable. - 1 teaspoon salt
Salt amplifies the flavors in the sushi rice, making each bite more flavorful. It helps to bring out the taste of the other ingredients, creating a well-rounded dish. - 4 sheets nori (seaweed)
Nori serves as the wrapping for the sushi roll, providing a distinct umami flavor and a necessary structure to hold the fillings. It’s important to use high-quality nori for the best taste. - 1 ripe avocado, sliced
Avocado adds a creamy texture and rich flavor to the roll. Its healthy fats complement the sushi rice and other fillings, creating a satisfying mouthfeel. - 1 cucumber, julienned
Cucumber brings a refreshing crunch to the California Crunch Roll. Its water content and crisp texture enhance the overall eating experience, providing a contrast to creamier elements. - 1/2 pound imitation crab meat or real crab
Imitation crab (often made from surimi) is the traditional protein in California rolls, imparting a slightly sweet and seafood-like flavor. Its texture mimics that of real crab, contributing to the dish’s satisfaction. - 1/2 cup tempura crumbs (optional)
Tempura crumbs add a crunchy texture that elevates the California Crunch Roll. This extra crispness adds dimension to the roll, making each bite more exciting. - Soy sauce, for serving
Soy sauce serves as a traditional dipping sauce for sushi, enhancing the flavors of the roll. The salty umami profile complements the sushi perfectly, adding depth to each bite. - Pickled ginger, for serving
Pickled ginger not only adds flavor but also acts as a palate cleanser between bites. This is particularly helpful in refreshing the taste buds when enjoying sushi.
Directions & Preparation
Step 1: Rinse and cook the sushi rice.
Begin by rinsing the sushi rice under cold water until the water runs clear. This removes excess starch, which can make the rice gummy. Combine the rinsed rice with water in a rice cooker or pot and cook until tender. Properly cooked rice is key to achieving the right texture for rolling.
Step 2: Prepare the sushi vinegar mixture.
While the rice cooks, mix the rice vinegar, sugar, and salt in a small bowl. Stir until the sugar and salt dissolve. Once the rice is finished cooking, transfer it to a large bowl and gently fold in the vinegar mixture, using a spatula. This step is crucial to infuse the rice with flavor and adjust its moisture.
Step 3: Allow the rice to cool.
Let the seasoned rice cool to room temperature before making the rolls. Spreading it out in the bowl helps it cool evenly. Avoid refrigerating as cold rice becomes difficult to work with and loses its stickiness.
Step 4: Prepare the fillings.
While the rice cools, slice the avocado and julienne the cucumber into thin strips. If using crab, shred it into bite-sized pieces. Properly prepared fillings ensure even distribution within the rolls and enhance the overall texture and flavor.
Step 5: Assemble your rolling station.
Gather a bamboo sushi mat, a bowl of water, and your prepared ingredients. Having everything within reach ensures you can roll efficiently and prevents the rice from drying out. Make sure your mat is clean and lined with plastic wrap for easy cleanup.
Step 6: Lay the nori on the bamboo mat.
Place a seaweed sheet, shiny side down, on the bamboo mat. Align it so that one edge is closest to you. This position allows you to easily roll it away from you, creating a tight and uniform sushi roll. Press gently to keep it in place.
Step 7: Spread rice over nori, leaving space.
Wet your hands with water to prevent rice from sticking and take a handful of rice, spreading it evenly over the nori. Leave approximately an inch at the top edge to create a seal. Evenly distributing the rice ensures balanced flavors and easy rolling.
Step 8: Add the filling ingredients.
Create a line of crab, avocado slices, and cucumber strips across the rice. Don’t overfill to avoid difficulty rolling. This step is pivotal for achieving that iconic crunch and flavor combination that makes California rolls beloved.
Step 9: Roll the sushi tightly.
Starting from the edge closest to you, use the bamboo mat to lift and roll the sushi tightly away from you. Apply gentle pressure to help maintain the shape as you roll. Ensuring a tight roll prevents fillings from spilling out and provides a better overall texture.
Step 10: Seal the edge of the roll.
Moisten the top edge of the nori with a little water to create a seal, pressing firmly to hold the roll together. This step is essential for keeping the roll intact during cutting and serving.
Step 11: Slice the roll.
Use a sharp, wet knife to cut the roll into 6-8 equal pieces. Wetting the knife helps reduce sticking, ensuring clean cuts. Properly slicing ensures an attractive presentation and gives each piece an appealing structure.
Step 12: Serve with accompaniments.
Arrange the sushi pieces on a plate and serve with dipping sauce, pickled ginger, and extra tempura crumbs if desired. The presentation is key in sushi, as each component complements not just the flavor but the visual appeal as well.

The Importance of Fresh Ingredients
When crafting your California Crunch Roll, using fresh ingredients significantly impacts the overall flavor and texture of the sushi. Fresh seafood, ripe avocado, and crisp cucumber contribute vibrant taste profiles that make the rolls truly irresistible. Investing in high-quality ingredients elevates your sushi from a simple meal to an extraordinary experience, showcasing the true essence of Japanese cuisine.
Mastering the Art of Rolling
Rolling sushi may seem daunting at first, but practice makes perfect. The key to a successful roll lies in applying even pressure while using the bamboo mat. A light touch will yield loosely packed rolls, whereas too much pressure may squash your ingredients. Experiment with multiple rolls to find your rhythm and technique, ensuring each one is beautifully shaped and filled just right.
Pairing with Traditional Accompaniments
California Crunch Rolls are best enjoyed with traditional accompaniments that complement the flavors. Soy sauce provides a salty umami boost, while pickled ginger cleanses your palate between bites, enhancing your overall sushi experience. Consider adding a touch of wasabi for a spicy kick or a side of miso soup to round out your meal, creating a delightful dining experience.
FAQs
Why is my sushi rice too sticky?
If your sushi rice is too sticky, it could mean that it was overcooked or had too much water added. Ensure you're using the right rice-to-water ratio and adjust your cooking method to achieve the perfect texture.
Can I use brown rice in this recipe?
Yes, you can substitute brown rice, though it will require a longer cooking time and offer a different texture and flavor. Adjust the water quantity accordingly to achieve the desired consistency.
What if my roll falls apart when cutting?
If your roll falls apart, it may be due to overfilling or not rolling tightly enough. Use less filling next time and apply even pressure while rolling to maintain the integrity of the roll.
Can I add other fillings to my California Roll?
Absolutely! Feel free to get creative with fillings. Options like spicy tuna, tempura shrimp, or even a variety of vegetables can add delicious twists to your California Crunch Roll.
Why did my avocado turn brown in the rolls?
Avocado can brown when exposed to air. To slow this process, consider using fresh lemon juice or serving it right after cutting to retain its beautiful color and flavor.
What can I do if my tempura crumbs get soggy?
If your tempura crumbs become soggy, ensure they are stored in an airtight container and away from humidity. Adding them just before serving also helps maintain their crunch.
Conclusion
Creating California Crunch Roll sushi at home is an enjoyable culinary adventure that delights both the cook and the diners. With the right ingredients and techniques, you can impress your friends and family while enjoying every bite.
The beauty of sushi lies not only in its flavors but in the artistry of its creation. Dive into this delicious world, experiment with flavors, and savor the rewarding experience of crafting sushi at home.
Recipe Card
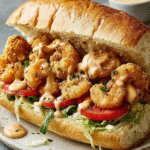
Delicious Shrimp Po’ Boy Sandwich Recipe for Home Chefs
Ingredients
- 1 pound large shrimp peeled and deveined
- 1 cup buttermilk
- 1 cup all-purpose flour
- 1 cup cornmeal
- 1 teaspoon paprika
- 1 teaspoon garlic powder
- 1 teaspoon cayenne pepper
- Salt and black pepper to taste
- Vegetable oil for frying
- 4 hoagie rolls or French bread
- Lettuce shredded
- Tomato sliced
- Remoulade sauce for serving
Instructions
- Marinate the shrimp in buttermilk.
- Prepare the breading mixture.
- Heat oil in a deep skillet.
- Bread the shrimp.
- Fry the shrimp in batches.
- Prepare the hoagie rolls.
- Assemble the sandwich.
- Serve immediately.
Notes
Additional serving suggestions: pair with a crisp salad, garlic bread, or roasted seasonal vegetables for balance.
For make-ahead, prep components separately and assemble just before heating to preserve texture.
Taste and adjust with acid (lemon/vinegar) and salt right at the end to wake up flavors.


