Introduction
Nothing beats the aroma of freshly baked bread wafting through your home, and these quick dinner rolls make it incredibly easy to bring that comfort to your family table. In just 25 minutes, you can whip up soft, fluffy rolls that are the perfect accompaniment to any meal, be it a simple weeknight dinner or a special celebration.
These rolls not only elevate your dining experience, but they also allow you to bond with your kids in the kitchen. They can help knead the dough, shape the rolls, or even brush on the butter before baking. This recipe is user-friendly, requiring minimal ingredients and time, making it an ideal choice for the busy mom managing a household.
Ingredients
- 2 cups all-purpose flour
Flour forms the backbone of the rolls. It provides the necessary structure and texture, allowing the rolls to rise beautifully. The protein content helps develop gluten, which gives the rolls their soft chewiness. - 1 tablespoon sugar
Sugar not only adds a hint of sweetness but also feeds the yeast, helping to create a light and airy texture in the rolls. It enhances browning through caramelization, giving your rolls a lovely golden color. - 1 teaspoon salt
Salt is crucial for flavor and it controls the fermentation of yeast. It strengthens the gluten structure, ensuring the rolls have a nice texture while also balancing the sweetness from the sugar. - 1 tablespoon instant yeast
Instant yeast acts quickly, allowing the dough to rise faster than traditional yeast. It ensures that your rolls can be ready in just 25 minutes, making it perfect for busy schedules. - 3/4 cup warm water (110°F)
Warm water activates the yeast, helping it to bloom and grow, which is important for the rise. It also starts the hydration process for the flour, making for a dough that's easy to work with. - 2 tablespoons unsalted butter, melted
Butter enriches the dough, adding flavor and moisture while contributing to a soft texture. Brushing melted butter on top before baking gives the rolls a shiny finish. - Optional: garlic powder or herbs
Adding herbs or garlic powder can take these rolls to the next level, infusing them with aromatic flavors. It's a simple way to tailor the recipe to your family's preferences.
Directions & Preparation
Step 1: Preheat your oven to 375°F (190°C).
Preheating the oven is an essential step that ensures your rolls will bake evenly and rise properly. Starting with a hot oven allows for that initial burst of heat, which is crucial in helping the yeast activate quickly.
Step 2: In a large mixing bowl, combine the flour, sugar, salt, and instant yeast.
Mixing the dry ingredients together first allows for even distribution of the yeast and salt, which is key for consistent rising. This step also prevents clumps, ensuring that your dough will be smooth.
Step 3: Gradually add in warm water and melted butter. Mix until a soft dough forms.
This step's purpose is to hydrate the flour properly and create a cohesive dough. It's essential to monitor the consistency; it should be soft but not overly sticky. Adjust with a bit more flour if needed.
Step 4: Knead the dough on a floured surface for about 2-3 minutes.
Kneading develops gluten, which is crucial for the structure of your rolls. Just a few minutes of kneading will create a smooth texture and encourage elasticity, giving your rolls a delightful chew.
Step 5: Divide the dough into 8 equal portions and shape them into balls.
Shaping the dough into equal portions ensures that your rolls bake uniformly. A gentle touch is key here; too much pressure can deflate the dough, affecting the final rise.
Step 6: Place the dough balls on a greased baking sheet, cover them with a towel, and let them rest for 10-15 minutes.
Allowing the rolls to rest lets them rise slightly, which contributes to a fluffier texture in the final bake. This short resting period enhances their overall lightness and allows the flavors to develop.
Step 7: Brush the tops of the rolls with melted butter, then bake for 12-15 minutes.
Brushing with butter before baking creates a beautiful, golden crust while adding flavor. Keep an eye on the rolls as they bake; they should be golden brown and sound hollow when tapped on the bottom.
Step 8: Remove them from the oven and let them cool for a few minutes before serving.
Allowing the rolls to rest slightly before serving allows the steam to escape, preventing them from becoming soggy. This moment also gives them time to set, making them easier to handle.

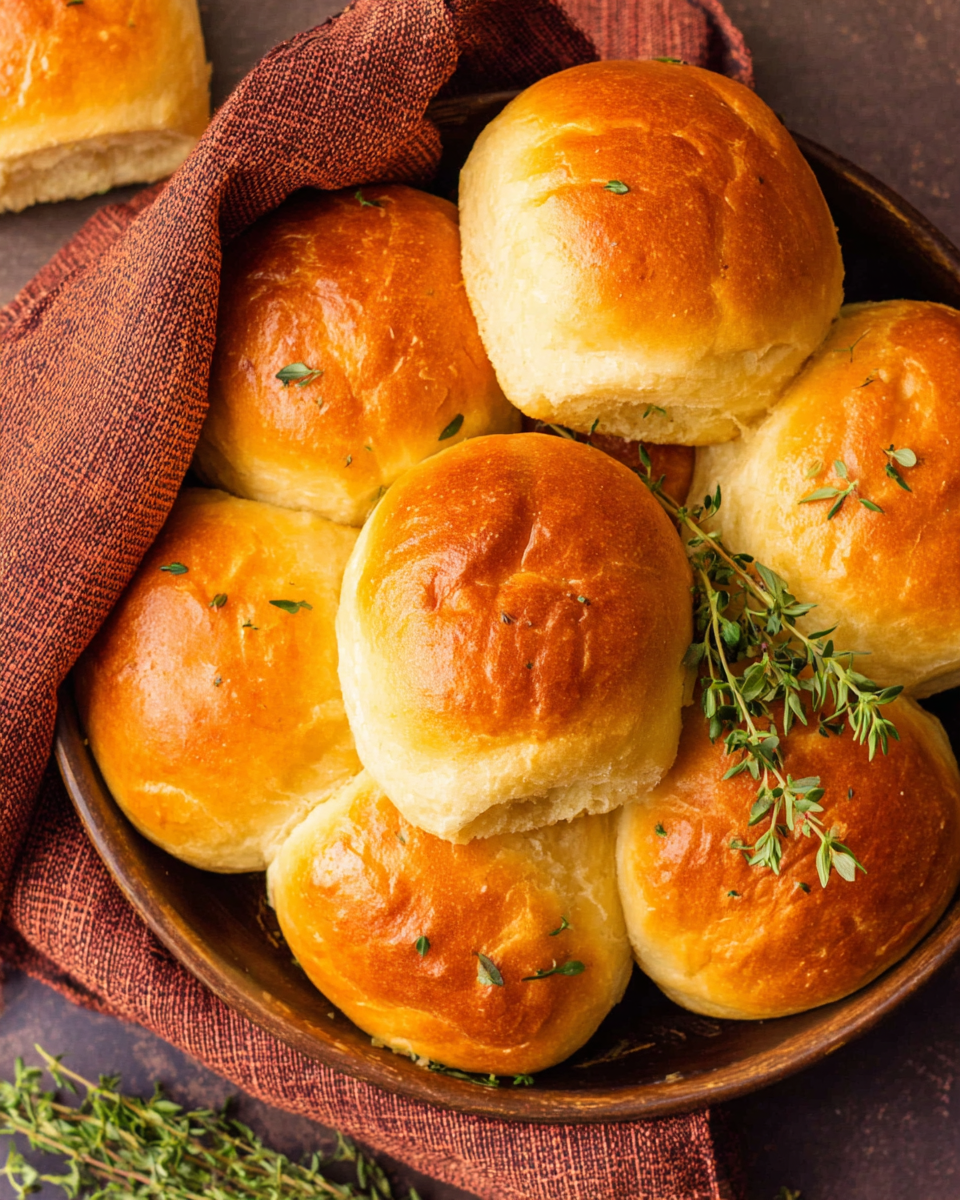
A Flavorful Twist for Extra Appeal
While the basic dinner rolls are wonderfully fluffy and satisfying on their own, consider adding flavorings to personalize your creation. Ingredients like garlic powder, freshly grated parmesan, or a sprinkle of dried herbs like rosemary or thyme can elevate your rolls from simple to sensational. These additions not only enhance flavor but also make your dinner rolls a talking point at the dinner table.
Perfect Pairings for Your Dinner Rolls
These quick dinner rolls serve as a delicious side for many meals. They beautifully accompany hearty stews, soups, or even grilled meats. Spread a little herb-infused butter on top or serve them alongside your favorite dip to create a unique experience. Their versatility ensures they can fit seamlessly into any meal plan, from casual family dinners to elegant gatherings.
Making the Most of Your Kitchen Time
Using just one bowl for mixing and one baking sheet for baking means there is minimal cleanup involved. This efficiency is ideal for busy moms who cherish every minute saved. The recipe can be prepared quickly, allowing you to focus on other dinner components or spend quality time with your family, rather than getting overwhelmed in the kitchen.
FAQs
Can I use whole wheat flour instead of all-purpose?
Yes, you can substitute whole wheat flour, but the rolls may be denser. You might need to add a bit more water to achieve the right dough consistency.
What should I do if my dough is too sticky?
If your dough is too sticky to handle, gradually add a little more flour as you knead it until it reaches the right consistency. Just be careful not to overdo it.
How can I tell when the rolls are fully baked?
Your rolls are done when they are golden brown on top and sound hollow when tapped on the bottom. Keep an eye on them in the last few minutes of baking.
What can I add for a sweet twist?
Consider adding a cinnamon-sugar mixture to the dough or brushing the rolls with a mixture of melted butter and honey before serving for a sweetened flavor.
Can I make smaller dinner rolls for appetizers?
Yes, you can divide the dough into more than 8 portions for smaller rolls. Just be sure to adjust the baking time slightly to avoid overbaking.
What if my rolls come out dense?
Dense rolls can often be a result of over-kneading or not enough rising time. Make sure to give the dough adequate time to rest and rise to achieve a light texture.
Conclusion
Baking dinner rolls at home doesn’t have to be a time-consuming task. With this quick 25-minute recipe, you can provide warm, comforting rolls that are sure to impress your family. The simplicity of the ingredients and the speed of preparation make this recipe a true holy grail for busy moms.
Whether enjoyed alongside a cozy family meal or as a special treat during the week, these rolls are bound to become a favorite in your household. Embrace the joy of baking, and make these delightful rolls a regular part of your meal rotations.
Recipe Card

Savory Southwest Beef and Sweet Potato Skillet
Ingredients
- 1 pound ground beef
- 2 medium sweet potatoes diced
- 1 medium onion diced
- 2 cloves garlic minced
- 1 bell pepper diced
- 1 teaspoon chili powder
- 1 teaspoon cumin
- Salt and pepper to taste
- 1 tablespoon olive oil
- Fresh cilantro for garnish
Instructions
- Heat olive oil in a large skillet over medium heat.
- Add diced onions and bell pepper, sauté until soft.
- Stir in minced garlic, and sauté for an additional minute.
- Add ground beef, season with salt, pepper, chili powder, and cumin.
- Cook the beef until browned and cooked through.
- Add diced sweet potatoes, cover, and reduce heat to low.
- Cook until sweet potatoes are tender, about 15-20 minutes.
- Garnish with fresh cilantro before serving.
Notes
Additional serving suggestions: pair with a crisp salad, garlic bread, or roasted seasonal vegetables for balance.
For make-ahead, prep components separately and assemble just before heating to preserve texture.
Taste and adjust with acid (lemon/vinegar) and salt right at the end to wake up flavors.


