Introduction
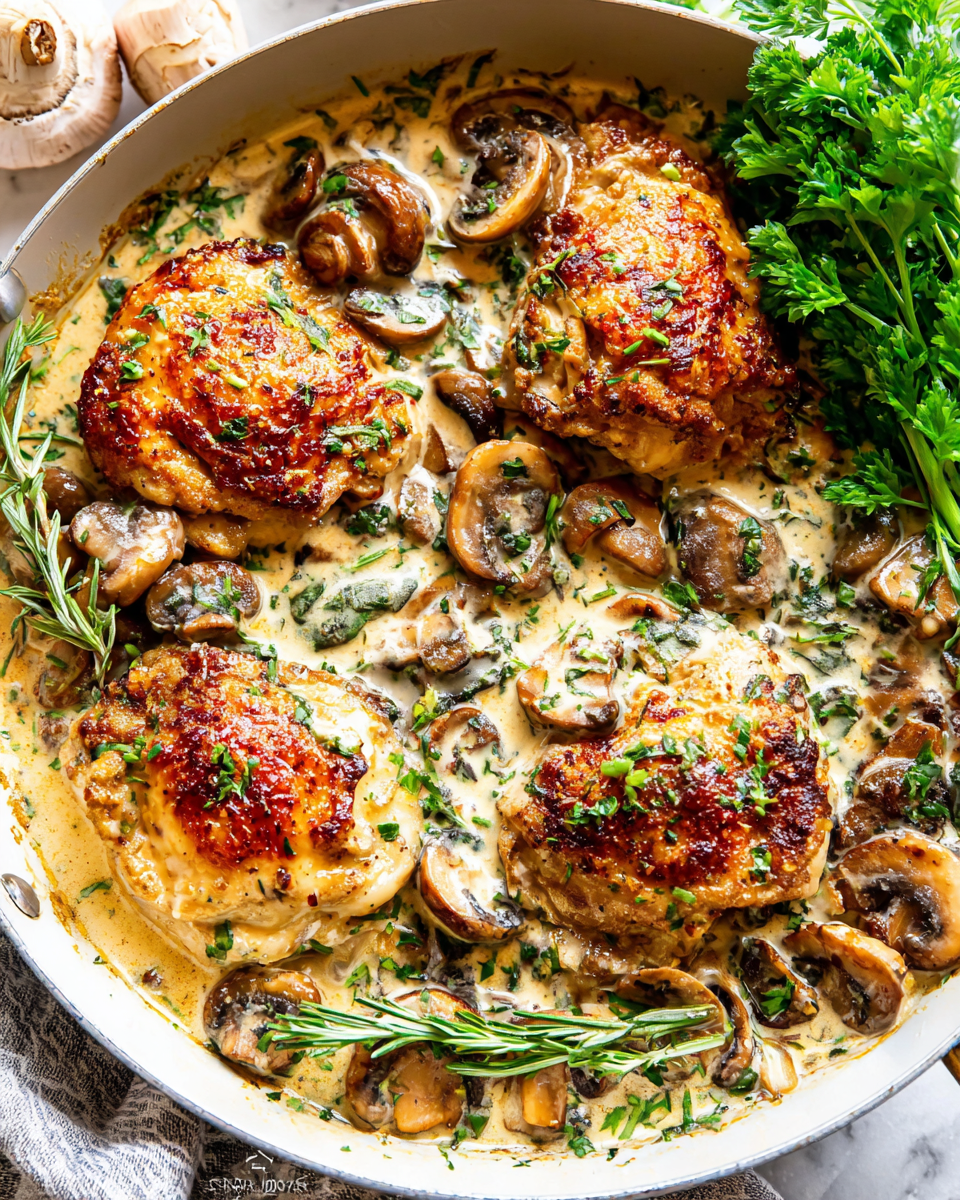
Crispy, golden-brown chicken glazed in a vibrant cranberry orange sauce transforms a simple weeknight dinner into a celebration of flavors. This Skillet Cranberry Orange Chicken offers the ideal balance of sweet, tart, and savory, combining the festive flavors of cranberries and oranges for an irresistible dish.
Cooking chicken in a skillet not only saves time but also ensures a juicy, golden crust that seals in moisture. The cranberry-orange sauce adds depth and richness, elevating your dish while being easy enough for any home cook to master. Whether for a family meal or a special occasion, this recipe brings warmth and cheer to your table.
Ingredients
- 4 boneless, skinless chicken breasts
Chicken breasts are lean yet tender, providing a neutral base that absorbs the flavor of the sauce beautifully. Their ability to cook quickly in a skillet makes them perfect for a simple, weeknight meal. - 1 cup fresh cranberries
Fresh cranberries contribute a bright, tart flavor that balances the sweetness of the sauce. They break down during cooking, creating a deliciously thick glaze that clings to the chicken. - 1/2 cup orange juice
Orange juice adds a natural sweetness and acidic brightness to the dish, enhancing the flavor of the cranberries and adding complexity to the sauce. Freshly squeezed juice provides the best flavor. - 1 tablespoon orange zest
The finely grated orange zest punctuates the dish with aromatic oils, intensifying the citrus flavor. It boosts the overall freshness and aroma of the dish. - 2 tablespoons honey
Honey serves as a natural sweetener that gives the sauce a beautiful glaze while achieving the perfect balance between tartness and sweetness. It helps to enhance the overall flavor profile, making it well-rounded. - 2 cloves garlic, minced
Minced garlic introduces a pungent, savory element that counters the sweetness of the sauce. It adds depth and warmth to the dish that complements the chicken and fruit beautifully. - 1 tablespoon olive oil
Olive oil is essential for searing the chicken, providing a flavorful base that prevents sticking and promotes a golden crust. Its heart-healthy fats also enhance the overall richness of the dish. - Salt and pepper to taste
Seasoning with salt and pepper is crucial for enhancing all the ingredients' flavors. A balanced seasoning brings out the best in both the chicken and the vibrant sauce.
Directions & Preparation
Step 1: Heat the olive oil in a large skillet over medium-high heat.
Starting with a well-heated skillet ensures that the chicken obtains a nice sear right away. The oil should shimmer but not smoke; this is your signal that it’s ready to add the chicken. Properly heating the oil enhances flavor and contributes to that desired crispy exterior.
Step 2: Season the chicken breasts with salt and pepper and place them in the skillet.
By seasoning the chicken generously before placing it in the skillet, you help bring out its natural flavors. Make sure there’s enough space between each piece, which allows for even cooking and crisping. Avoid crowding the pan to prevent steaming.
Step 3: Cook the chicken for about 6-7 minutes on each side, until golden brown and cooked through.
Cooking for the right duration on each side is vital for ensuring the chicken doesn’t dry out. The chicken should release from the skillet easily when it's initially well-seared. Use a meat thermometer to check for an internal temperature of 165°F for safety.
Step 4: Remove the chicken and set it aside on a plate.
Resting the chicken allows the juices to redistribute, keeping the meat tender and moist. Cover with foil to keep it warm while preparing the sauce. Taking the chicken out of the pan is crucial for developing the sauce's flavors.
Step 5: Reduce the heat to medium and add garlic to the skillet, stirring for about 30 seconds.
Adding garlic to the residual oil infuses the entire dish with its aromatic essence. Stirring constantly prevents the garlic from burning, which can introduce bitterness. This step lays the flavor foundation for the sauce.
Step 6: Add cranberries, orange juice, orange zest, and honey to the skillet.
Combining the cranberries, orange juice, and honey creates a beautiful sauce that will thicken as the cranberries cook down. This mixture releases flavors that meld beautifully with the garlic, resulting in a dynamic glaze.
Step 7: Simmer for about 5-7 minutes, until the cranberries burst and the sauce thickens.
Simmering allows the cranberries to release their juices, which combined with the orange juice and honey creates a rich, flavorful sauce. By cooking until the sauce thickens, you ensure it clings to the chicken perfectly.
Step 8: Return the chicken to the skillet and coat it in the sauce.
Coating the chicken in the bubbling sauce reintroduces it to the skillet, allowing the flavors to meld. This step is crucial for achieving a deliciously glazed finish. Make sure each piece is well-coated for a lovely presentation.
Step 9: Cook for an additional 2-3 minutes to heat through.
Finishing the chicken in the sauce ensures it’s fully heated, allowing it to absorb more flavor from the glaze. Watch closely during this final step to avoid overcooking, which can lead to dry chicken.
Step 10: Serve the skillet cranberry orange chicken immediately, garnished with additional cranberries if desired.
Presenting the chicken with a few extra cranberries adds a fresh touch and showcases the sauce’s vibrant color. Serving immediately ensures the dish is enjoyed at its best, warm and juicy, with a delightful mix of flavors.

Perfecting the Sauce Consistency
Achieving the right consistency in your cranberry orange sauce is crucial for an eye-catching dish. If the sauce turns out too thin, consider simmering it a little longer to allow some excess liquid to evaporate. On the other hand, if it’s too thick, add a splash of chicken broth or orange juice to reach your desired consistency. The goal is a glaze that clings to the chicken without being overly runny or gloopy.
Adding Depth with Aromatics
Adding aromatics like minced shallots or ginger can elevate your skillet chicken to new flavor depths. These ingredients contribute additional layers to the sauce, marrying well with the tart cranberries and sweet oranges. Experiment with your favorite herbs too, such as thyme or rosemary, for a unique twist that matches well with the dish's profile.
Choosing the Right Chicken
Selecting high-quality chicken is essential for any great dish. Aim for fresh, organic chicken breasts when possible. Look for pieces that are plump and firm to the touch. If you prefer dark meat, chicken thighs can be used as a delightful substitute; just adjust cooking times as they may require a bit longer. The chicken’s quality can greatly affect the overall flavor and tenderness of the final dish.
FAQs
What can I do if the cranberry orange sauce is too tart?
Add a bit more honey or a pinch of sugar to balance the tartness while simmering. Taste the sauce as you adjust to find the right level of sweetness for your palate.
Can I make this recipe with frozen cranberries?
Yes, you can use frozen cranberries instead of fresh. Just be aware that they may require a bit longer to cook down in the sauce, but the flavor will still be delicious.
What if my chicken breasts are too thick?
If your chicken breasts are particularly thick, consider butterflying them or pounding them to an even thickness for more consistent cooking. This will help them cook through evenly without drying out.
How can I enhance the orange flavor further?
Boost the orange flavor with a splash of orange liqueur, such as Grand Marnier, or by adding additional orange zest. This enhances the citrus notes present in the dish.
Can I serve this dish over rice or quinoa?
Absolutely! Serving the cranberry orange chicken over rice or quinoa allows you to enjoy the delicious sauce while adding a hearty base. This also makes for a complete meal.
What should I do if the sauce is too runny?
If the sauce is too runny, continue to simmer it on low heat to encourage it to thicken. Stir frequently to avoid burning, as you cook off the excess liquid.
Conclusion
Skillet Cranberry Orange Chicken is not just a meal; it’s a delightful celebration of flavors that brings warmth to any occasion. The time you invest in crafting both the chicken and the vibrant sauce is rewarded with a dish that captures the spirit of home cooking.
With its tempting aroma and visually appealing colors, this dish is sure to impress your family or guests. Don't hesitate to experiment with ingredients and add your personal touch to make it uniquely yours.
Recipe Card
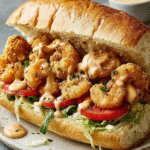
Delicious Shrimp Po’ Boy Sandwich Recipe for Home Chefs
Ingredients
- 1 pound large shrimp peeled and deveined
- 1 cup buttermilk
- 1 cup all-purpose flour
- 1 cup cornmeal
- 1 teaspoon paprika
- 1 teaspoon garlic powder
- 1 teaspoon cayenne pepper
- Salt and black pepper to taste
- Vegetable oil for frying
- 4 hoagie rolls or French bread
- Lettuce shredded
- Tomato sliced
- Remoulade sauce for serving
Instructions
- Marinate the shrimp in buttermilk.
- Prepare the breading mixture.
- Heat oil in a deep skillet.
- Bread the shrimp.
- Fry the shrimp in batches.
- Prepare the hoagie rolls.
- Assemble the sandwich.
- Serve immediately.
Notes
Additional serving suggestions: pair with a crisp salad, garlic bread, or roasted seasonal vegetables for balance.
For make-ahead, prep components separately and assemble just before heating to preserve texture.
Taste and adjust with acid (lemon/vinegar) and salt right at the end to wake up flavors.