Introduction
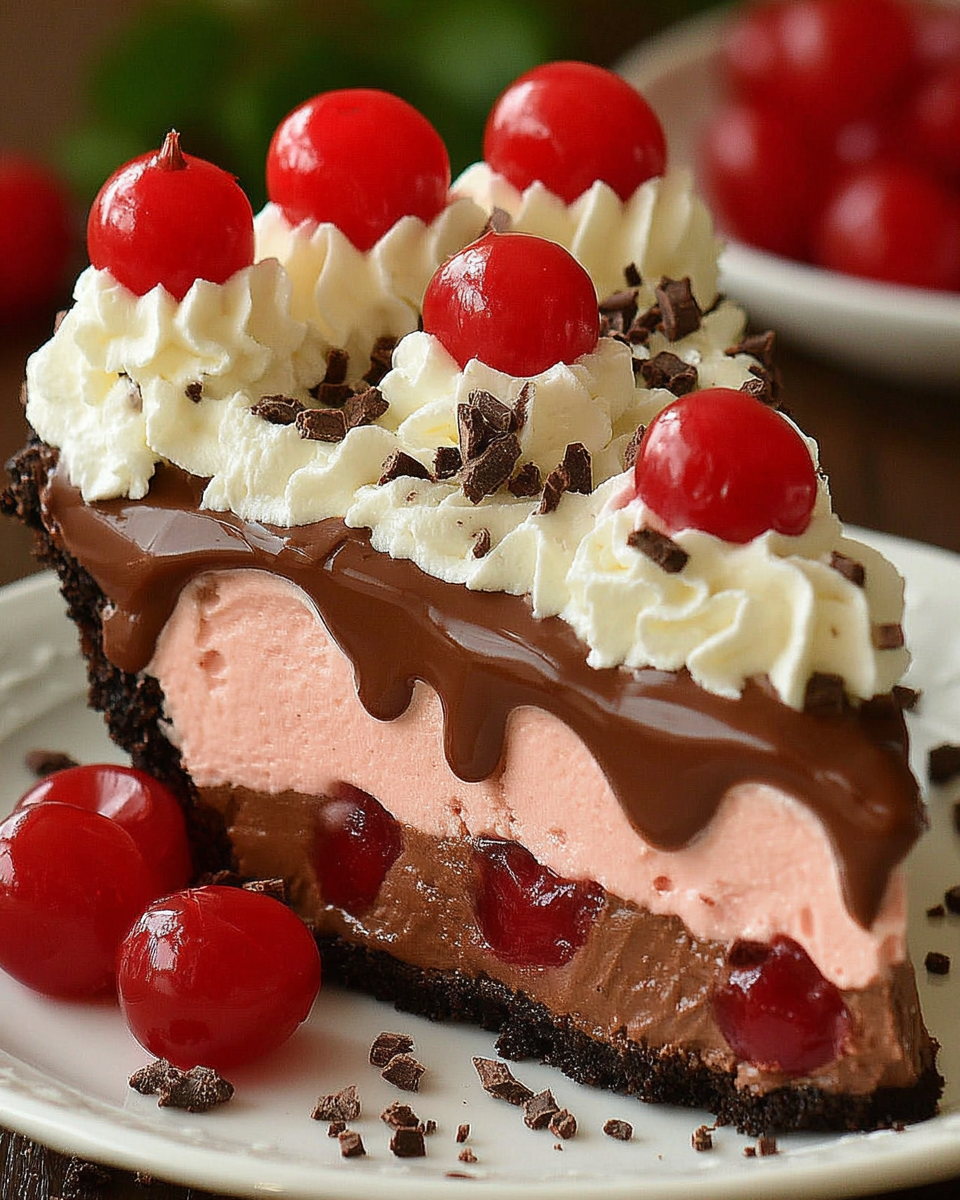
Chocolate Cherry Cream Pie is a delightful dessert that marries the rich depth of chocolate with the sweet-tartness of cherries. This pie is perfect for those who appreciate the luxurious combination of flavors and textures, making it a standout addition to any gathering or special occasion.
What truly sets this pie apart is its creamy filling, which brings a smooth and velvety texture, acting as a perfect counterpoint to the crunchy crust and the fresh cherries. Each slice is an invitation to indulge, creating a little moment of joy in every bite.
Ingredients
- 1 ½ cups graham cracker crumbs
Graham cracker crumbs serve as the base for the crust, providing a subtle sweetness and a crumbly texture that contrasts beautifully with the creamy filling. - ½ cup unsalted butter, melted
Unsalted butter binds the cracker crumbs and adds richness to the crust while ensuring it holds together during slicing and serving. - 2 cups fresh or frozen pitted cherries
Cherries contribute a burst of flavor that balances the richness of the chocolate, and the slight acidity helps to cut through the sweetness of the pie. - 1 cup heavy cream
Heavy cream is essential for creating the fluffy, whipped texture of the filling, ensuring the pie is light yet luxurious. - 8 oz cream cheese, softened
Cream cheese adds tanginess and creaminess to the filling, enhancing the overall flavor profile while contributing to the desired texture. - 1 cup semi-sweet chocolate chips
Semi-sweet chocolate chips provide the primary chocolate flavor, melting into the filling to create a rich, decadent experience. - ½ cup powdered sugar
Powdered sugar sweetens the filling without making it grainy, helping to maintain a smooth texture while balancing the richness of the chocolate and cream. - 1 tsp vanilla extract
Vanilla extract enhances the overall flavor of the pie, adding a warm undertone that complements the chocolate and cherries beautifully. - ½ tsp almond extract
Almond extract adds a nutty note, enhancing the cherry flavor and bringing a unique depth that elevates the pie's profile.
Directions & Preparation
Step 1: Prepare the crust
Start by preheating your oven to 350°F (175°C). In a mixing bowl, combine graham cracker crumbs with melted butter until they resemble wet sand. This mixture will form the pie crust once pressed into the bottom and up the sides of a pie pan. Baking the crust for about 10 minutes helps solidify it, ensuring a sturdy base when filled, which is crucial for maintaining structure once the cream filling is added.
Step 2: Cool the crust
After baking, allow the crust to cool completely in the pie pan. This step is vital; a warm crust can melt the filling's ingredients when poured in, potentially affecting the texture and flavor of the final pie. Cooling allows the crust to firm up, making it easier to slice once the pie is assembled.
Step 3: Prepare the cherry layer
If using fresh cherries, wash, pit, and chop them; for frozen, thaw and drain any excess liquid. This layer of cherries will be the first to go into the pie, providing a tartness that balances the sweetness of the cream filling. It's essential to let any frozen cherries drain to avoid a soggy pie, ensuring you get that perfect bite of flavor without excess moisture.
Step 4: Make the chocolate filling
In a saucepan over low heat, melt the chocolate chips until smooth. Allow the melted chocolate to cool slightly before incorporating it into a mixture of whipped cream, cream cheese, powdered sugar, and extracts. This is an essential step as it prevents the heat from melting the cream mixture, ensuring a light and airy texture while also melding the flavors together perfectly.
Step 5: Combine the filling
Using a mixer, beat the cream cheese until smooth, then gradually add the cooled chocolate, continuing to beat just until combined. This step ensures that the chocolate is evenly incorporated into the filling, maintaining a uniform flavor throughout the pie. The key here is not to overmix, as this can cause the filling to become grainy instead of perfectly smooth.
Step 6: Whip the cream
In a separate bowl, whip the heavy cream until soft peaks form. Fold this into the chocolate mixture gently to retain its airy quality. Whipping the cream until soft peaks form creates the light texture that contrasts with the dense chocolate. It’s important to fold the mixture carefully to preserve the volume from the whipped cream, which is what makes the pie filling luscious but not overly heavy.
Step 7: Assemble the pie
Layer the bottom of the cooled crust with the prepared cherries, then pour the chocolate cream mixture on top. Spreading the cherries first helps distribute their flavor throughout the pie. The combination of textures, from the crunchy crust to the creamy chocolate filling and juicy cherries, makes each slice a delightful experience.
Step 8: Chill the pie
Refrigerate the assembled pie for at least 4 hours, or overnight if possible. Chilling allows the filling to set, ensuring clean slices when served. This is a crucial step as serving the pie too soon may result in a filling that oozes out rather than holds its shape, impacting both the presentation and texture.
Step 9: Serve
Once the pie is set, slice and serve chilled. Consider garnishing with additional cherries or whipped cream for an extra touch. Proper presentation not only enhances the visual appeal but also invites those around to indulge, making each slice as enticing as the last. Enjoying this delicious dessert is the perfect way to conclude any meal.

Crafting the Perfect Chocolate Cream
The chocolate filling is the heart of this pie and achieving the right balance is paramount. Using high-quality semi-sweet chocolate chips ensures that the flavor is rich and deep, while careful melting and mixing allows the cream and chocolate to merge beautifully. This filling sets it apart and creates a luxurious experience where each bite is a blend of silky chocolate and delightful cherries.
Balancing Sweetness with Tartness
The cherries bring a wonderful tartness that pairs exquisitely with the rich chocolate filling. If the cherries are too sweet, consider incorporating a touch of lemon juice to brighten their flavor. This balance between sweet and tart is essential for a nuanced dessert, allowing the flavors to shine without overpowering one another, ensuring that each bite is refreshing and satisfying.
Texture Matters: From Crisp to Creamy
The dynamic texture of this pie is vital for creating an enjoyable eating experience. The crunchy graham cracker crust, the creamy chocolate filling, and the juicy cherries together create a delightful combination that keeps each bite interesting. Ensuring each component is prepared correctly will yield a pie that delights the senses and makes for a memorable dessert.
FAQs
What if my chocolate filling is too thick?
If your filling is too thick, try gently folding in a little extra whipped cream or milk to lighten it up. This can help achieve a smoother consistency, making the pie filling more manageable for spreading.
Can I use frozen cherries instead of fresh?
Yes, you can use frozen cherries, but make sure to thaw and drain them properly to avoid excess moisture in your pie. This way, you preserve the desired texture and flavor balance.
How can I prevent a soggy crust?
To avoid a soggy crust, ensure it cools completely before adding the filling, and consider blind-baking it until lightly golden. This creates a firmer structure that can hold up better against moisture.
What can I do if my pie filling is too sweet?
If your filling turns out too sweet, you could add a pinch of salt or a splash of lemon juice to balance the sweetness. This will enhance the overall flavor without compromising the integrity of the pie.
Can I substitute the cream cheese with ricotta?
Ricotta can be used as a substitute for cream cheese, but the texture will differ slightly. It will provide a creamier mouthfeel but might lack the tanginess typical of cream cheese, so consider adjusting other flavors accordingly.
How do I make a lighter filling?
To create a lighter filling, incorporate more whipped cream and less cream cheese. Ensure to fold gently to preserve the airiness. This results in a fluffier texture while still maintaining important flavors.
Conclusion
A Chocolate Cherry Cream Pie is not only a treat for the palate but also a feast for the eyes, making it a superb choice for gatherings. The balance of textures and flavors offers a delightful experience that lingers long after the last slice.
Creating this pie at home provides a sense of accomplishment and the joy of sharing a beloved dessert with family and friends. Indulge in the decadence and let this pie bring warmth and sweetness to your table.
Recipe Card

Elevate Your Lunch with Chicken Caesar Salad Wraps
Ingredients
- 2 cooked chicken breasts shredded
- 4 cups romaine lettuce chopped
- 1 cup Caesar dressing
- 1/2 cup grated Parmesan cheese
- 1 cup croutons crushed
- 4 large tortillas
- Salt and pepper to taste
Instructions
- Prepare the chicken.
- Chop the romaine lettuce.
- Mix the salad ingredients.
- Add crushed croutons.
- Fill the tortillas.
- Roll the wraps.
- Serve immediately or toast.
Notes
Additional serving suggestions: pair with a crisp salad, garlic bread, or roasted seasonal vegetables for balance.
For make-ahead, prep components separately and assemble just before heating to preserve texture.
Taste and adjust with acid (lemon/vinegar) and salt right at the end to wake up flavors.


