Introduction
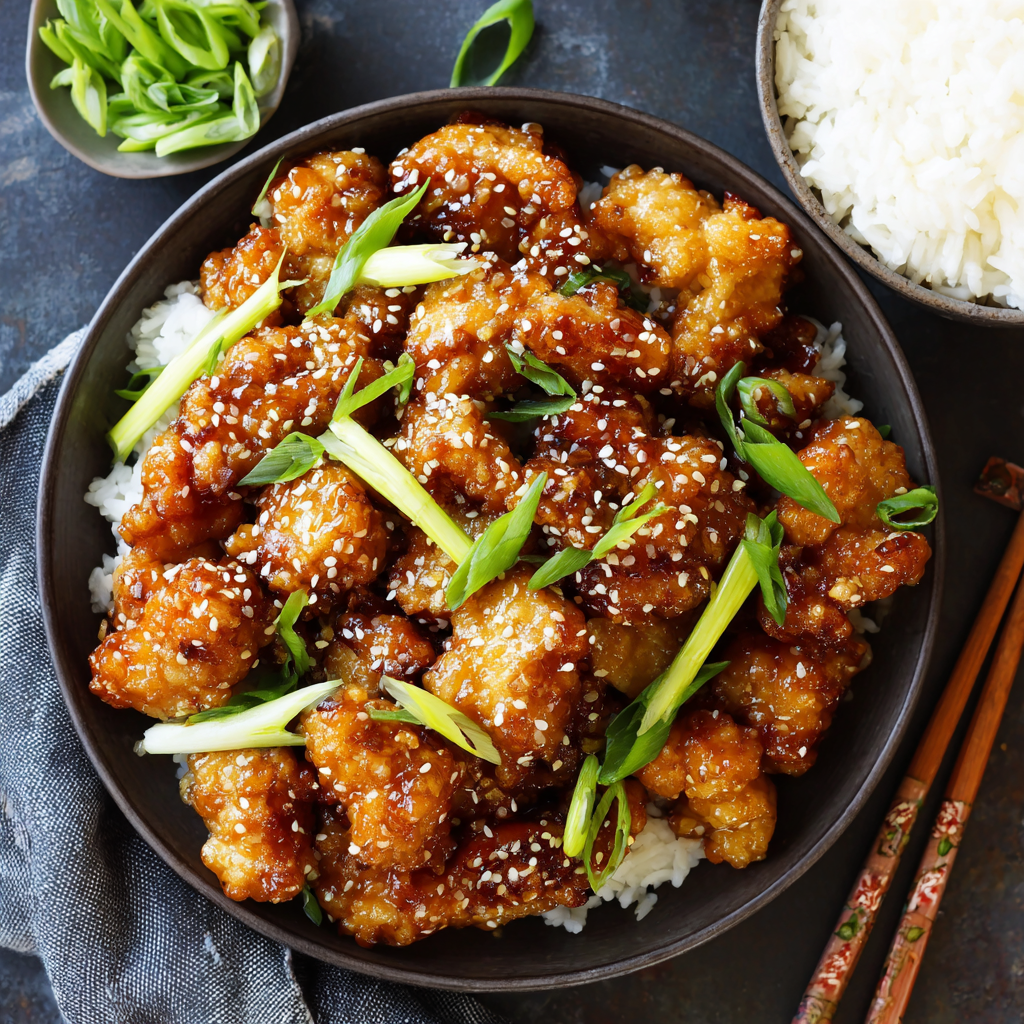
Crispy Sesame Chicken is a beloved dish that combines crunchy, tender chicken with a sweet and savory sesame sauce. It's a staple in many households, cherished for its delightful texture and rich flavors. Cooking this at home empowers you to control the ingredients, enhancing both taste and nutrition.
Bringing this dish to your kitchen doesn’t require complicated techniques or hard-to-find ingredients. With just a few straightforward steps, you can create a satisfying meal that pleases everyone at the table. This recipe ensures the chicken remains juicy while the coating achieves that coveted crispiness we all love.
Ingredients
- 2 lbs chicken thighs, boneless and skinless
Chicken thighs add juiciness and flavor due to their higher fat content compared to chicken breasts, making them ideal for achieving crispy results. Their ability to withstand cooking without drying out ensures a tender bite. - 1 cup cornstarch
Cornstarch is a crucial ingredient in achieving that signature crispy texture. It creates a light, crispy coating when fried, absorbing less oil than traditional breadcrumbs. - 1/2 cup all-purpose flour
Flour helps in binding the cornstarch to the chicken and adds an additional layer of crispness. It also aids in browning the chicken nicely when sautéed. - 2 large eggs
Eggs act as a glue for the coating, holding the cornstarch and flour mixture onto the chicken. They also enhance flavor and color during cooking. - 1/4 cup vegetable oil (for frying)
Vegetable oil is essential for frying; it has a high smoke point, allowing for even cooking and browning without imparting unwanted flavors. - 1/4 cup soy sauce
Soy sauce provides a depth of umami flavor and saltiness, elevating the dish. It's also vital in the sauce that coats the chicken for added richness. - 1/4 cup honey
Honey adds sweetness and helps create a beautiful glaze when combined with soy sauce, balancing the saltiness and providing a sticky texture. - 2 tablespoons sesame oil
Sesame oil adds a distinct nutty flavor, enhancing the overall taste of the dish. It contributes to the aromatic quality that is characteristic of sesame chicken. - 2 tablespoons sesame seeds
Sesame seeds are sprinkled on top as a garnish; they add crunch and enhance the sesame flavor, making the dish visually appealing. - 2 green onions, chopped
Chopped green onions add freshness and a bit of onion flavor to the dish, complementing the richer flavors of the chicken and sauce.
Directions & Preparation
Step 1: Prepare the chicken.
Start by cutting the chicken thighs into bite-sized pieces. This is crucial for even cooking and ensures that each piece gets adequately coated. Use a sharp knife for clean cuts, allowing for a uniform texture throughout the dish.
Step 2: Set up a dredging station.
In three separate bowls, place the cornstarch, flour, and beaten eggs. This assembly line method makes the coating process smoother and more efficient. A well-organized workspace will help you achieve an even coating on the chicken.
Step 3: Coat the chicken pieces.
Dip each piece of chicken first in the cornstarch, then the egg, and finally in the flour. This multi-layered coating is what gives your chicken that delightful crunch. Ensure each piece is entirely covered; this is the foundation for crispy results.
Step 4: Heat the oil.
In a large skillet or wok, add vegetable oil and heat over medium-high heat until shimmering. The oil temperature is vital; too low will make the chicken soggy, while too high can burn the coating before the chicken cooks through. Use a thermometer or test with a small piece of chicken.
Step 5: Fry the chicken.
Carefully add the coated chicken pieces to the hot oil in batches, ensuring that they have space to fry without overcrowding. Cook until golden brown and crispy, about 5-6 minutes per side. The goal is a deep, rich color to indicate perfect crispiness.
Step 6: Remove and drain.
Once cooked, transfer the chicken to a plate lined with paper towels to absorb excess oil. This step is crucial as it prevents the chicken from becoming greasy, preserving that delightful crunch you’ve worked to achieve.
Step 7: Prepare the sauce.
In a small saucepan, combine soy sauce, honey, and sesame oil. Cook over medium heat until the honey is fully dissolved and the mixture slightly thickens, creating a sleek glaze that will adhere beautifully to the chicken.
Step 8: Combine chicken with the sauce.
In a large bowl, toss the fried chicken pieces with the sauce, ensuring each piece is evenly coated. This allows the flavors to meld together, creating a caramelized finish that enhances the overall appeal of the dish.
Step 9: Garnish and serve.
Transfer the glazed chicken to a serving platter, and sprinkle with sesame seeds and chopped green onions. This final touch not only adds visual interest but also a hit of freshness, complementing the richer flavors of the dish.

Enhancing Flavor with Marinades
Marinades play an indispensable role in infusing deeper flavors into chicken dishes like this one. By allowing your chicken to marinate in a mixture of soy sauce, garlic, and a touch of ginger before frying, you can significantly elevate the taste profile. This extra step is simple yet effective, providing an additional layer of umami and enhancing the overall richness of your crispy sesame chicken.
The Secret to Crunchy Coating
Achieving that perfect crunch involves more than just frying technique. The unique combination of cornstarch and flour in the dredging process is key to creating a crispy, light coating that doesn’t absorb too much oil. Moreover, letting the coated chicken rest for a few minutes before frying can further enhance texture, allowing the coating to adhere better and creating a notably crunchier bite.
Serving Suggestions to Elevate the Meal
While crispy sesame chicken is delightful on its own, serving it with sides can transform your meal into a more complete dining experience. Consider pairing it with steamed jasmine rice or a refreshing Asian slaw for a delightful contrast in texture. Additionally, a side of stir-fried vegetables can not only add color but also nutrients, rounding out your dinner plate beautifully.
FAQs
What if my chicken doesn’t get crispy?
If your chicken is not crispy, ensure the oil is hot enough before frying. Overcrowding the pan can also cause the temperature to drop, leading to soggy chicken. Finally, consider adding a little more cornstarch for extra crunch.
Can I scale this recipe up for a party?
Absolutely! To scale up, maintain the ratios of the ingredients but fry in batches to ensure even cooking. This will help you manage cooking time and maintain consistent quality.
What if the sauce turns out too thick?
If the sauce is overly thick, you can add a splash of water or additional soy sauce to thin it out to your desired consistency. Heat gently while stirring to incorporate the liquid.
How can I make this dish spicier?
To add heat, consider incorporating chili garlic sauce or crushed red pepper flakes into the sauce mixture. Start with a small amount and taste as you go to achieve your preferred level of spice.
What’s the best way to ensure the chicken cooks evenly?
Cutting the chicken into similar-sized pieces is essential for even cooking. Keeping the oil at a consistent temperature also helps ensure thorough cooking and promotes an even golden color.
What can I do if the chicken tastes bland?
If the chicken tastes bland, reconsider your seasoning before frying. Adding salt and pepper to the chicken and using a slightly richer marinade can enhance flavor significantly.
Conclusion
Homemade Crispy Sesame Chicken is a delightful addition to your culinary repertoire. With its irresistible crunch and savory-sweet flavor, it's bound to become a favorite in your household. Enjoy the satisfaction of creating this dish that not only tastes incredible but also brings loved ones to the table.
Take pride in every crispy piece you serve, knowing that you've brought a restaurant-quality meal into your kitchen. With a bit of practice and the right techniques, you’ll be crafting this flavorful dish to perfection, ready to impress any guest.
Recipe Card
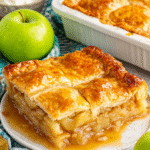
Delightful Apple Slab Pie for Home Bakers
Ingredients
- 2 1/2 cups all-purpose flour
- 1 cup unsalted butter cold and cubed
- 1/4 cup granulated sugar
- 1/2 teaspoon salt
- 1/4 to 1/2 cup cold water
- 6 to 8 medium apples peeled, cored, and sliced
- 1/2 cup brown sugar
- 2 teaspoons ground cinnamon
- 1 tablespoon lemon juice
- 1 tablespoon cornstarch
- 1 egg beaten (for egg wash)
Instructions
- Prepare the pie crust by mixing flour, sugar, and salt together.
- Cut in the cold butter until the mixture resembles coarse crumbs.
- Gradually add cold water, a tablespoon at a time, until the dough holds together.
- Divide the dough in half and refrigerate for at least 1 hour.
- Preheat your oven to 375°F (190°C).
- Roll out one portion of the dough to fit a rimmed baking sheet.
- Transfer the rolled-out dough to the baking sheet and trim the edges.
- In a bowl, combine the sliced apples, brown sugar, cinnamon, lemon juice, and cornstarch.
- Pour the apple mixture onto the crust and spread it evenly.
- Roll out the second portion of dough and place it over the apples, sealing the edges.
- Brush the top with beaten egg for a golden finish.
- Bake for 45-50 minutes, or until the crust is golden and the filling is bubbling.
- Let the pie cool for at least 30 minutes before slicing.
Notes
Additional serving suggestions: pair with a crisp salad, garlic bread, or roasted seasonal vegetables for balance.
For make-ahead, prep components separately and assemble just before heating to preserve texture.
Taste and adjust with acid (lemon/vinegar) and salt right at the end to wake up flavors.


