Introduction
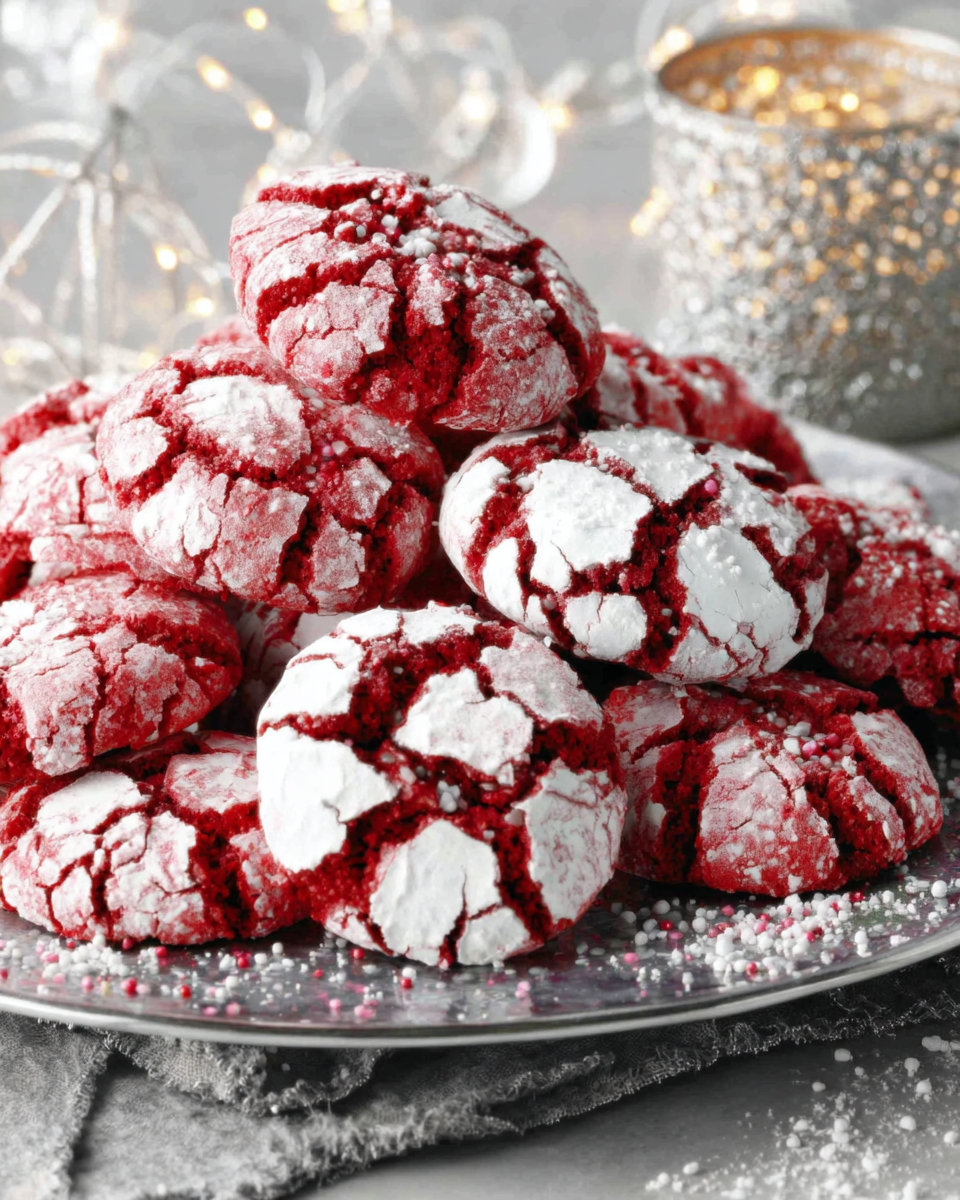
Red Velvet Crinkle Cookies are the perfect treat to bring festivity to your baking. With their stunning deep red hue and white powdered sugar coating, they not only taste delicious but also make for an impressive presentation.
These cookies combine the rich flavors of chocolate and vanilla with a hint of tanginess from buttermilk. The result is a fudge-like texture that is soft and chewy, making them irresistible to anyone who tries them.
Ingredients
- 2 1/2 cups all-purpose flour
All-purpose flour forms the backbone of these cookies, providing structure and stability. It also helps to create that classic chewy texture that contrasts nicely with the fudgy interior. - 1 cup granulated sugar
Sugar contributes sweetness and is essential for the crinkle effect. As it melts during baking, it helps to create the cookie’s signature surface texture. - 1/2 cup unsweetened cocoa powder
Cocoa powder adds a rich chocolate flavor, enhancing the depth of the cookie. Using unsweetened cocoa keeps the balance between sweetness and chocolate intensity just right. - 1/2 teaspoon baking powder
Baking powder is a leavening agent that helps the cookies rise slightly while baking, contributing to a lighter texture. It ensures the cookies don’t become too dense. - 1/2 teaspoon baking soda
Baking soda works in conjunction with the acidic components of the recipe, such as buttermilk, to help the cookies rise and achieve that delightful crinkle. - 1/2 teaspoon salt
Salt enhances the overall flavor of the cookies, balancing out the sweetness. It also helps to intensify the chocolate notes, making them more prominent. - 1/2 cup unsalted butter, softened
Butter adds richness and moisture to the cookies, contributing to their soft texture. It also helps to bind the ingredients and adds a wonderful buttery flavor. - 1/4 cup vegetable oil
Vegetable oil keeps the cookies moist and tender, ensuring they remain chewy even after baking. This addition creates a unique texture alongside the butter. - 1 large egg
Eggs provide structure and stability, as well as moisture. They assist in binding the ingredients together, making for a cohesive dough that holds its shape during baking. - 1 tablespoon red gel food coloring
Red gel food coloring gives the cookies their iconic color. Gel is preferable to liquid as it doesn't alter the consistency of the dough, ensuring the right texture. - 1 teaspoon vanilla extract
Vanilla adds a warm, aromatic flavor that complements the chocolate in the cookies. It rounds out the taste profile, enhancing the overall experience of each bite. - Powdered sugar for dusting
Powdered sugar adds not only a charming visual element but also a delicate sweetness that contrasts with the cookies’ richness. It helps accentuate the crinkle effect.
Directions & Preparation
Step 1: Preheat your oven to 350°F (175°C).
Preheating your oven is crucial for consistent baking. Starting the baking process in a hot oven ensures that the cookies rise correctly and develop a nice crinkle on the surface. Use an oven thermometer if you want to be precise about the temperature.
Step 2: In a large bowl, whisk together the flour, cocoa powder, baking powder, baking soda, and salt.
Whisking the dry ingredients together helps to evenly distribute the leavening agents and cocoa. This step prevents clumping and ensures that each cookie has a balanced flavor. Make sure to incorporate enough air into the mix for a lighter texture.
Step 3: In another bowl, cream together the softened butter, vegetable oil, and granulated sugar until light and fluffy.
Creaming the butter and sugar incorporates air into the mixture, which will help the cookies rise. The mixture should become pale and fluffy, indicating that it’s been mixed long enough. This step also contributes to the cookies' texture, making them tender and moist.
Step 4: Add the egg, buttermilk, red gel food coloring, and vanilla extract to the butter mixture, and mix until well combined.
Incorporating the wet ingredients at this point ensures a smooth, homogenous dough. The food coloring must be mixed thoroughly so that the vibrant red color is consistent throughout the batter. It's important to not overmix once the egg is added to avoid tough cookies.
Step 5: Gradually add the dry ingredients to the wet mixture, stirring until just combined.
Mixing the dry and wet ingredients together should be done gently to prevent overworking the dough. Overmixing can lead to tough cookies rather than the desired chewy texture. It's okay if there are a few pockets of flour left; they will incorporate as you stir.
Step 6: Cover the dough and chill in the refrigerator for at least 30 minutes.
Chilling the dough is essential for controlling the spread of the cookies during baking. A chilled dough creates a firmer texture that results in thicker cookies. This step also allows the flavors to meld, leading to a more developed taste.
Step 7: Scoop tablespoon-sized balls of dough and roll them in powdered sugar before placing them on a lined baking sheet.
Rolling the dough balls in powdered sugar creates that classic crinkle cookie appearance. The sugar forms a crust as the cookies bake, which leads to the desired texture. Make sure to leave enough space between each dough ball on the baking sheet to allow for spreading.
Step 8: Bake for 10-12 minutes, or until the edges are set but the center remains soft.
Baking for the right amount of time is critical for achieving the fudge-like interior. If they're too soft, they may collapse when cooled, while overbaking leads to a dry texture. Trust your senses: the cookies should look slightly firm but still soft in the center.
Step 9: Let the cookies cool on the baking sheet for 5 minutes before transferring them to a wire rack.
Cooling the cookies on the sheet allows them to firm up slightly, making it easier to transfer them without breaking. This step also helps enhance their texture as the residual heat continues to cook them slightly. Afterward, transferring to a wire rack ensures they cool evenly.

Mastering the Perfect Red Color
Achieving the right shade of red in your cookies is vital for that classic red velvet look. Using gel food coloring is recommended over liquid, as it provides a deeper hue without changing the dough’s consistency. Carefully measure the amount; adding too much can affect the flavor, while too little may result in a dull color.
Emphasizing Texture with Fudginess
The deliciously fudgy texture of these cookies comes from a balanced combination of butter and oil, as well as the perfect baking time. By not overbaking, you ensure that the center stays soft and chewy, while the outer layer becomes just crisp enough. This contrast is what makes a crinkle cookie uniquely satisfying.
Variations to Explore
While traditional red velvet crinkle cookies are beloved, there are exciting variations to consider. Adding chocolate chips or swapping vanilla extract for peppermint can elevate the flavor profile. Feel free to experiment with mix-ins like chopped nuts or white chocolate for an added twist. These tweaks allow you to personalize the recipe based on your taste.
FAQs
What if my cookie dough is too soft?
If your dough feels too soft to scoop, try chilling it for an additional 15-30 minutes. This will firm it up, making it easier to handle without losing shape during baking.
Can I use Dutch-processed cocoa powder instead of unsweetened?
Yes, but be aware that using Dutch-processed cocoa may alter the flavor slightly and affect how the cookies rise due to their different acidity. Adjust leavening agents accordingly if you notice any changes.
What if my cookies lose their crinkle after baking?
If your cookies do not crinkle as expected, they may not have been chilled long enough or may have been overmixed. Proper chilling helps control spread, and minimal mixing before baking preserves that classic fudgy texture.
How do I prevent the cookies from sticking to the baking sheet?
Using parchment paper or a silicone mat is the best way to prevent sticking. If you don’t have either on hand, consider lightly greasing the baking sheet to create a nonstick surface.
Can I make these cookies smaller for bite-sized treats?
Absolutely! Simply reduce the size of your dough balls. Just remember to adjust the baking time accordingly, checking for doneness before the recommended time.
What should I do if my cookies turn out bland?
If the cookies taste bland, it may be due to insufficient salt or the vanilla extract. You can try adding a pinch more salt or ensuring that your extract is fresh for optimal flavor.
Conclusion
Red Velvet Crinkle Cookies bring a festive touch to any occasion, whether it’s a holiday gathering or a simple family treat. With their unique flavor and delightful texture, they are sure to become a favorite.
By following these instructions and paying attention to the details, you’ll create beautifully crinkled cookies that are both visually appealing and incredibly delicious. Enjoy sharing the joy of baking with these vibrant and fudgy delights!
Recipe Card
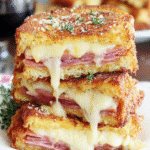
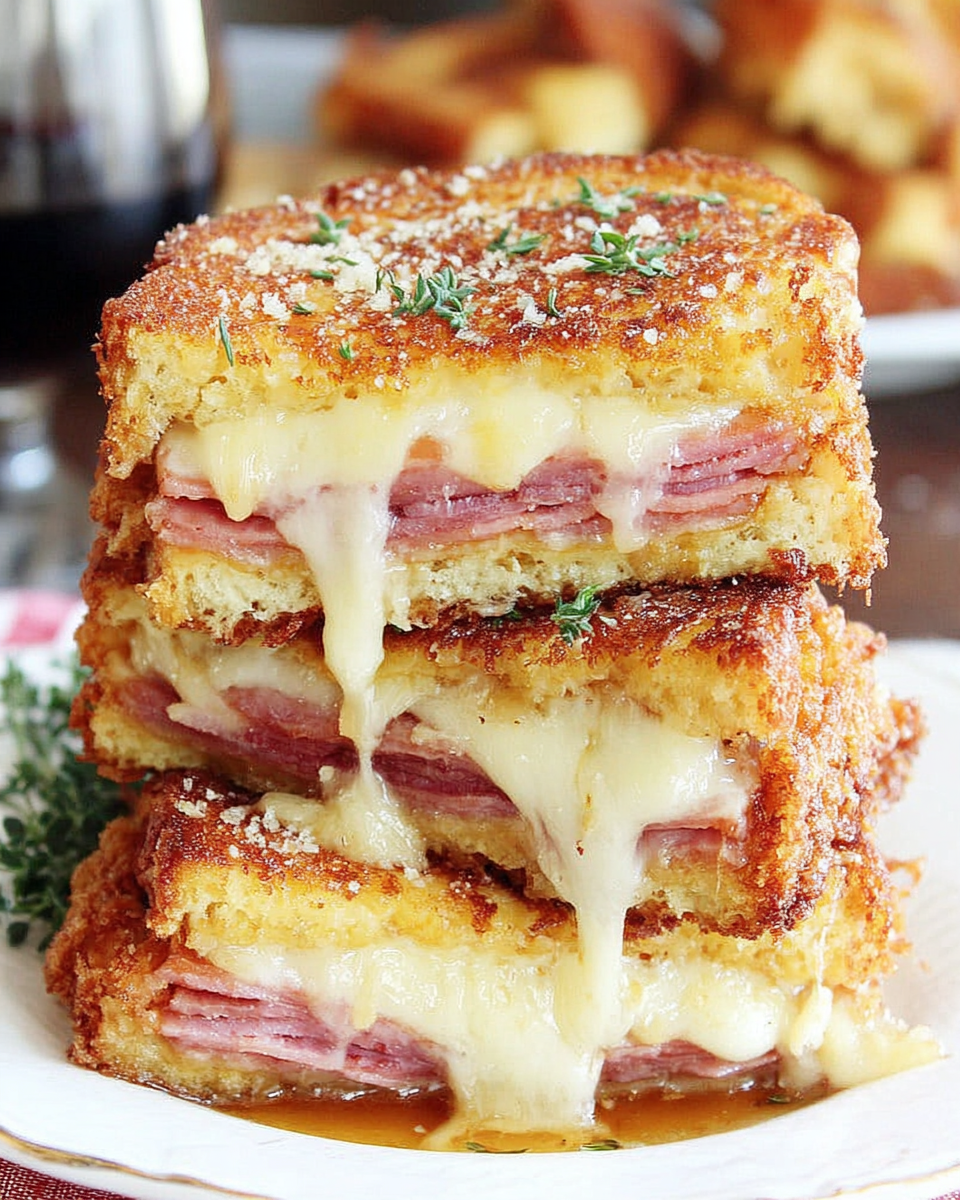
Savory Monte Cristo Sandwich Simple & Delicious
Ingredients
- 8 slices of bread
- 4 slices of deli ham
- 4 slices of deli turkey
- 4 slices of Swiss cheese
- 4 large eggs
- 1/4 cup milk
- 1 teaspoon Dijon mustard
- Salt and pepper to taste
- Butter for grilling
Instructions
- Gather all your ingredients and work area.
- In a medium bowl, whisk together eggs, milk, Dijon mustard, salt, and pepper until fully combined.
- Lay out four slices of bread and layer two slices each of ham and turkey on top, followed by a slice of Swiss cheese.
- Top the sandwiches with the remaining slices of bread, forming four complete sandwiches.
- Heat a skillet over medium heat and add a tablespoon of butter.
- Dip each sandwich into the egg mixture, ensuring both sides are well-coated before placing them in the skillet.
- Cook each sandwich for 3-4 minutes on each side until golden brown and the cheese is melted.
- Transfer the finished sandwiches to a plate and keep warm while you repeat with the remaining sandwiches.
- Slice the sandwiches in half and serve immediately, optionally with a sprinkle of powdered sugar or a side of your favorite dipping sauce.
Notes
Additional serving suggestions: pair with a crisp salad, garlic bread, or roasted seasonal vegetables for balance.
For make-ahead, prep components separately and assemble just before heating to preserve texture.
Taste and adjust with acid (lemon/vinegar) and salt right at the end to wake up flavors.