Introduction
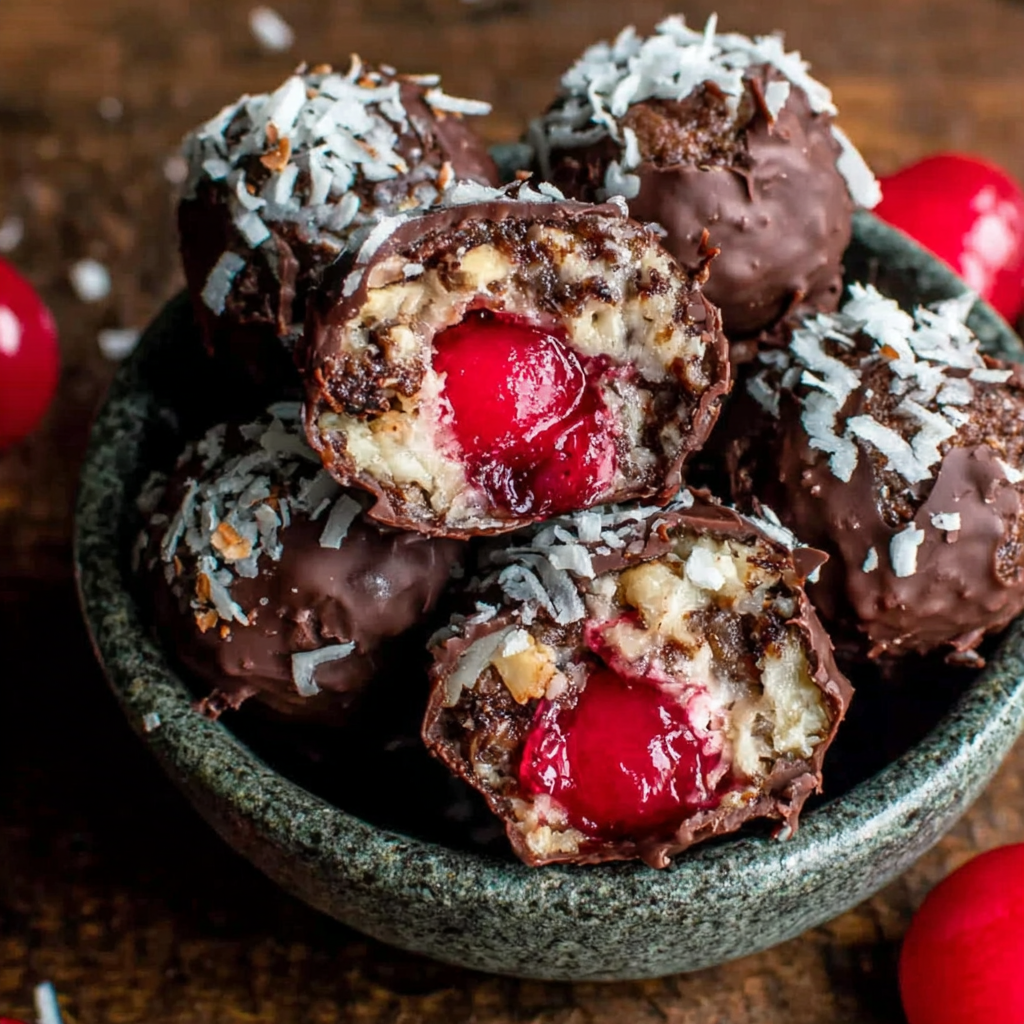
Cherry Bourbon Balls are a flavorful treat, bringing together the rich warmth of bourbon with the sweet tartness of cherries. Perfect for holiday gatherings or special celebrations, these bite-sized delights are sure to impress friends and family alike.
The combination of crushed cookies, cherries, and chocolate creates a satisfying texture and flavor profile that is hard to resist. Additionally, the infusion of bourbon elevates these confections, making them a unique addition to your dessert repertoire.
Ingredients
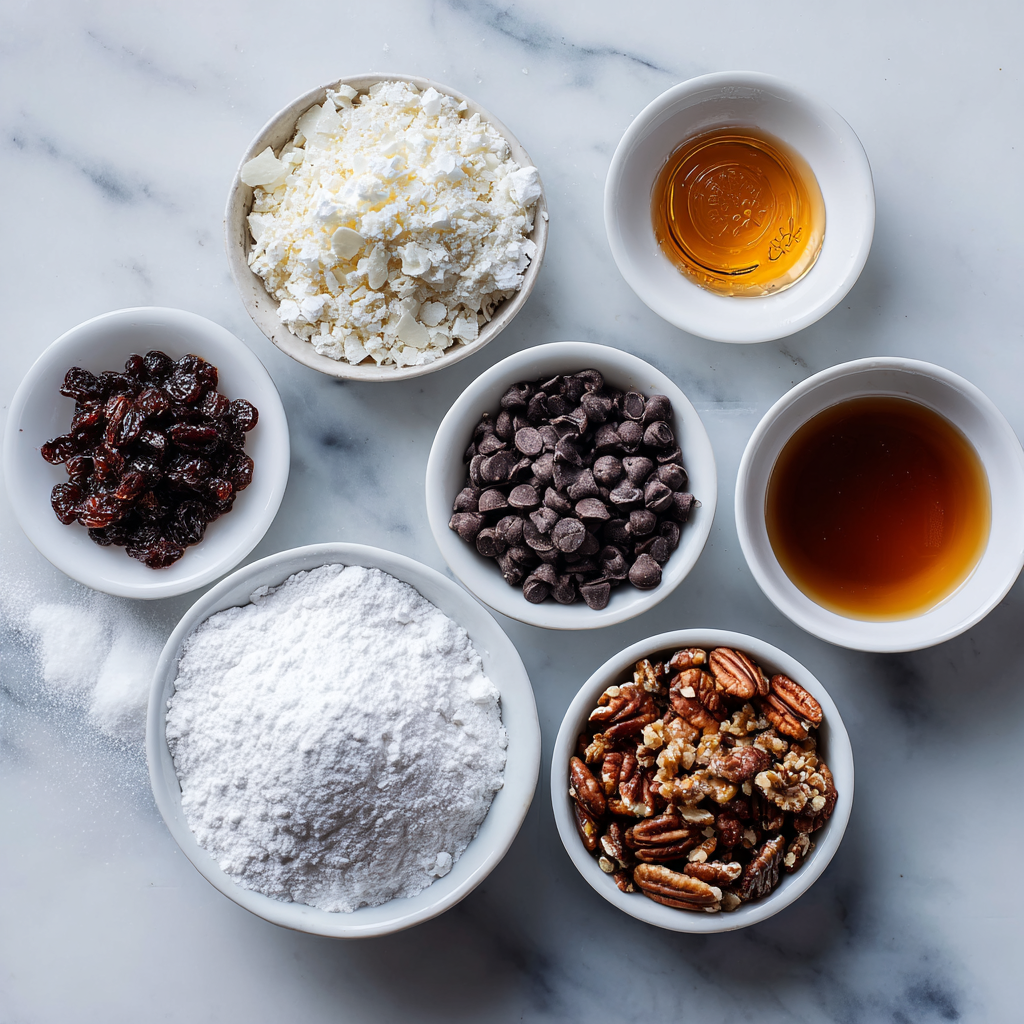
- 1 cup crushed vanilla wafers
These cookies provide a sweet and buttery base for the bourbon balls. Their light texture allows them to absorb moisture from the cherries and bourbon without becoming too dense. - 1/2 cup finely chopped dried cherries
Dried cherries contribute a delightful chewiness and a burst of fruity flavor. They complement the bourbon’s warmth and help to bind the mixture together. - 1/2 cup chopped pecans
Pecans add a rich, nutty flavor and a crunchy texture. They provide healthy fats that balance the sweetness of the other ingredients and enhance overall depth. - 1/4 cup bourbon
Bourbon infuses the balls with warmth and complexity. Its caramel and vanilla notes harmonize beautifully with the chocolate and cherries, creating a refined taste experience. - 1/4 cup granulated sugar
Sugar sweetens the mixture and helps with the binding process. It also enhances the overall flavor by balancing out tartness from the cherries. - 1/2 cup semi-sweet chocolate chips, melted
Melted chocolate coats the cherry bourbon balls, providing a smooth, rich exterior that contrasts with the chewy interior. It also adds an indulgent touch that elevates these treats. - Powdered sugar for rolling
Powdered sugar serves not only as a finishing touch but also helps to prevent the bourbon balls from sticking to hands or surfaces. It adds a decorative touch while offering a mild sweetness.
Directions & Preparation
Step 1: Prepare the dough mixture.
In a large mixing bowl, combine the crushed vanilla wafers, chopped dried cherries, and chopped pecans. This base mixture sets the foundation for the bourbon balls, ensuring an even distribution of flavors and textures. Mixing the dry ingredients first allows for better incorporation of the wet ingredients later.
Step 2: Add the bourbon and sugar.
Stir in the bourbon and granulated sugar to the dry mixture. The sugar not only sweetens the dough but also helps to create a moist consistency. The bourbon will blend into the mixture, enhancing the flavors and ensuring the cherries are plump and flavorful.
Step 3: Melt the chocolate.
Melt the semi-sweet chocolate chips in a microwave-safe bowl, heating in short intervals to avoid burning. This step is crucial as the chocolate will coat the balls and add a glossy finish. Ensuring that the chocolate is melted smoothly allows for an even coating and better presentation.
Step 4: Form the balls.
Using your hands, scoop out portions of the mixture and roll them into 1-inch balls. This step is vital for achieving the right texture; the warmth from your hands helps to slightly melt the mixture, making it easier to shape without crumbling.
Step 5: Chill the balls.
Place the formed balls onto a lined baking sheet and refrigerate for at least 30 minutes. Chilling allows the flavors to meld together and firms up the mixture, making it easier to dip in chocolate. This waiting period is essential to ensure that the final product is not too soft.
Step 6: Coat in chocolate.
Once chilled, dip each ball into the melted chocolate, ensuring they’re fully coated. Using a fork helps to lift the balls out while letting excess chocolate drip off. This step is about achieving that ideal chocolate shell which adds richness and a sophisticated touch to the dessert.
Step 7: Roll in powdered sugar.
Immediately after coating, roll each chocolate-covered ball in powdered sugar. This finishing touch not only adds sweetness but also serves as a decorative element, making the treats look appealing. It also helps prevent the chocolate from sticking to surfaces.
Step 8: Let them set.
Place the coated balls back on the baking sheet and let them sit until the chocolate hardens. This could take about an hour at room temperature or can be expedited by placing them in the refrigerator. Proper setting is critical for the final texture and presentation of the cherry bourbon balls.
Layering Flavors with Cherry and Bourbon
The marriage of cherry and bourbon creates a symphony of flavors in each bite. The tartness of the cherry cuts through the sweetness, while the bourbon adds a warm, oaky depth. This robust flavor profile makes the bourbon balls not just a dessert, but a conversation starter at any gathering.
The Role of Texture in Cherry Bourbon Balls
From the crunchiness of pecans to the chewiness of dried cherries, texture plays a critical role in the enjoyment of cherry bourbon balls. The contrast between the smooth chocolate exterior and the slightly coarse interior enhances the overall eating experience, making each bite satisfying.
Variations to Elevate Your Bourbon Balls
While the classic cherry bourbon ball recipe is delightful, consider experimenting with different nuts or adding spices like cinnamon for warmth. Dipping the balls in white chocolate or drizzling them with caramel can add another layer of decadence, allowing you to personalize this treat for any occasion.
FAQs
What should I do if the mixture is too dry?
If the mixture feels too dry and crumbly, gradually add a little more bourbon or even a splash of water to help bind it together. Start with a teaspoon at a time until you achieve the desired consistency.
Can I substitute the pecans for another nut?
Absolutely! Feel free to use walnuts or almonds if you prefer a different flavor or have nut allergies. Just ensure they’re finely chopped for the best texture in the bourbon balls.
What if the chocolate coating is too thick?
If the chocolate coating becomes too thick, melt it again and add a small amount of coconut oil or vegetable oil. This will create a thinner consistency, making it easier to coat the bourbon balls smoothly.
How can I make the bourbon flavor more prominent?
For a stronger bourbon flavor, increase the bourbon content in the mixture slightly, but be mindful of the consistency. You can also let the bourbon balls sit for a day to deepen the flavors.
What if I don’t have vanilla wafers?
If vanilla wafers aren’t available, crushed graham crackers or even digestive biscuits can work in a pinch. Just adjust the sweetness accordingly if needed.
Can I add other dried fruits to the mixture?
Definitely! Dried cranberries or apricots can complement the cherries beautifully, adding variety in both flavor and texture to your cherry bourbon balls.
Conclusion
Cherry Bourbon Balls are a delightful treat that combines nostalgic flavors with a touch of sophistication. Their versatility allows them to be featured at various celebrations, from casual get-togethers to more formal gatherings.
By making these expressive confections at home, you not only treat yourself to something special but also have the joy of sharing a homemade creation that resonates with flavor and memory. Enjoy crafting these delightful bites, and watch them become a favorite among family and friends.
Recipe Card
Decadent Cherry Bourbon Balls for Every Occasion
Ingredients
- 1 cup crushed vanilla wafers
- 1/2 cup finely chopped dried cherries
- 1/2 cup chopped pecans
- 1/4 cup bourbon
- 1/4 cup granulated sugar
- 1/2 cup semi-sweet chocolate chips melted
- Powdered sugar for rolling
Instructions
- Prepare the dough mixture.
- Add the bourbon and sugar.
- Melt the chocolate.
- Form the balls.
- Chill the balls.
- Coat in chocolate.
- Roll in powdered sugar.
- Let them set.
Notes
Additional serving suggestions: pair with a crisp salad, garlic bread, or roasted seasonal vegetables for balance.
For make-ahead, prep components separately and assemble just before heating to preserve texture.
Taste and adjust with acid (lemon/vinegar) and salt right at the end to wake up flavors.


