Introduction
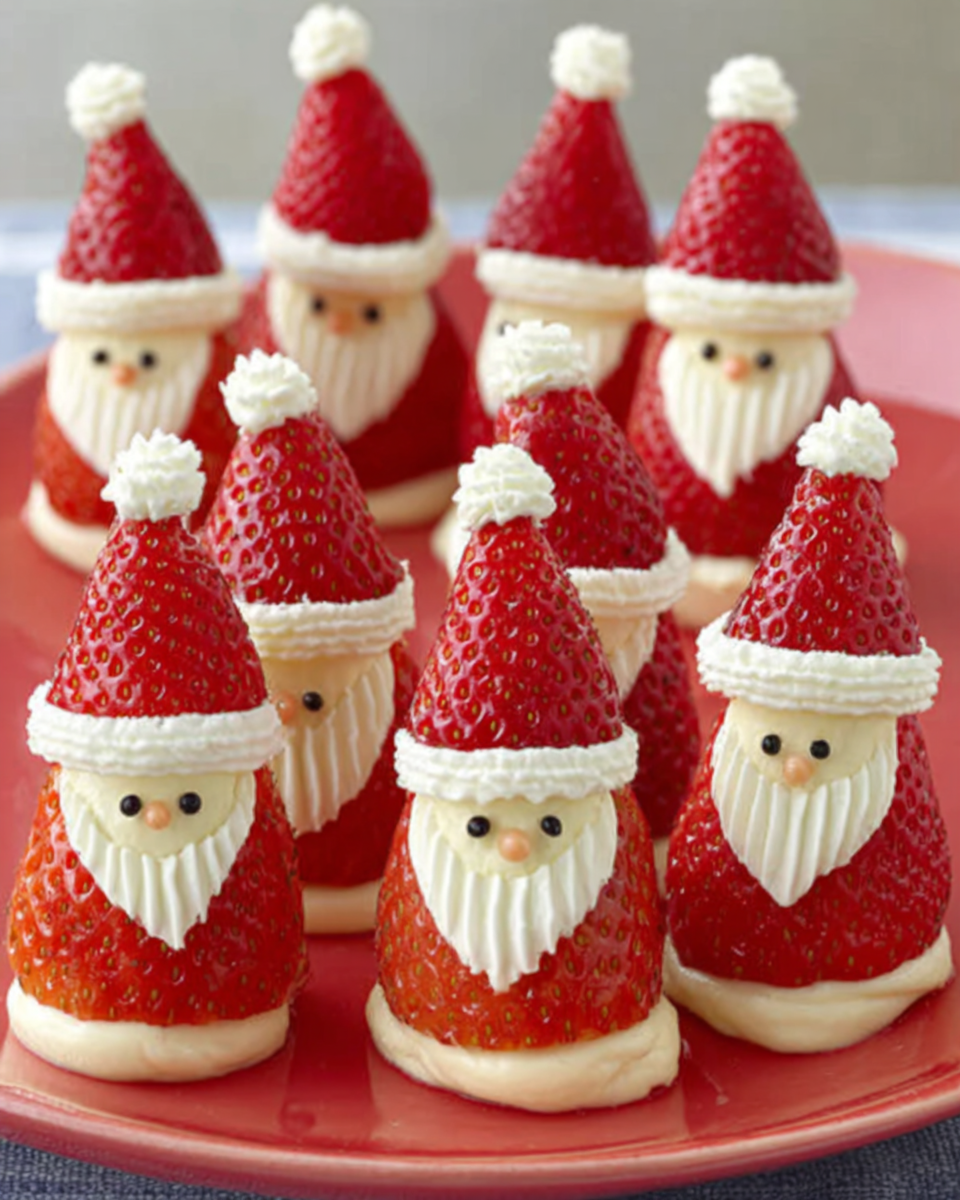
The holiday season is a time for joy, laughter, and delightful treats. This year, why not impress your friends and family with a whimsical dessert that combines the classic flavors of cheesecake and the festive spirit of strawberries? Strawberry Santas not only look adorable but are also packed with nutrition.
Made with fresh strawberries and a healthy cheesecake filling, these delightful Santas are perfect for holiday gatherings or simply to enjoy at home. This recipe is easy to follow, provides a burst of flavor, and can fit within various dietary preferences, allowing everyone to savor the festive cheer.
Ingredients
- 24 large strawberries
Strawberries form the body of our Santas, providing a juicy and refreshing bite. Opt for firm and ripe strawberries to ensure they hold their shape while representing Santa's iconic red outfit. - 8 oz cream cheese, softened
Cream cheese serves as the base of the cheesecake filling. Its creamy texture provides a rich mouthfeel while offering a subtle tang that pairs beautifully with fresh berries. - 1/2 cup Greek yogurt
Greek yogurt lightens the cheesecake filling while adding a protein boost. It also contributes a tangy flavor and helps achieve a creamy consistency without adding excessive calories. - 1/4 cup honey or maple syrup
Natural sweeteners like honey or maple syrup balance the richness of the cheesecake filling. Adjust the quantity based on your sweetness preference while maintaining a health-conscious approach. - 1 teaspoon vanilla extract
Vanilla extract enhances the flavor profile of the cheesecake filling, adding a warm aroma that complements the other ingredients. It brings the filling together and enriches its overall taste. - Mini chocolate chips or edible decorations (for eyes)
These tiny touches serve as Santa's eyes, adding personality to each delightful creation. Choose mini chocolate chips for a classic look or colorful sprinkles for a fun twist.
Directions & Preparation
Step 1: Prepare the strawberries.
Start by rinsing the strawberries under cold water and patting them dry gently with a paper towel. Carefully slice off the tops, making sure to leave enough of the fruit intact to serve as a stable base. This initial step is crucial as it shapes the structure of your Santas and ensures they stand upright, making your final product visually appealing.
Step 2: Create the cheesecake filling.
In a mixing bowl, combine the softened cream cheese, Greek yogurt, honey or maple syrup, and vanilla extract. Using a hand mixer or a whisk, blend until the mixture is smooth and creamy. This step is important because it determines the texture and taste of your filling. Avoid overmixing, which can incorporate too much air and lead to a less dense, satisfying filling.
Step 3: Fill the strawberries.
Using a piping bag or a small spoon, carefully fill each hollowed strawberry with the cheesecake filling, allowing it to mound slightly at the top. The filling should create a Santa hat effect. This process is both creative and practical—it allows you to create uniform shapes while ensuring a generous amount of cheesecake in each bite, enhancing the dessert’s overall appeal.
Step 4: Add eyes and decorations.
Once the filling is in, take the mini chocolate chips or your chosen edible decoration and press them gently into the filling to create Santa's eyes. This final touch is where your Strawberry Santas truly come to life. A little bit of creativity can transform these delicious desserts into festive works of art that will delight both children and adults alike.
Step 5: Chill before serving.
Place the filled strawberries in the refrigerator for at least 30 minutes before serving. Chilling allows the flavors to meld beautifully and the filling to set a bit, making them easier to handle. This step is essential for ensuring that the cheesecake filling behaves well and provides a cool, creamy experience that contrasts delightfully with the juicy strawberries.

Choosing the Perfect Strawberries
The success of your Strawberry Santas largely depends on the quality and size of the strawberries. When selecting, look for ones that are bright red, evenly shaped, and firm to the touch. Avoid any with blemishes or soft spots, as these can compromise the aesthetic and textural integrity of your Santas. Opt for organic if possible, as they often have a richer flavor and are free from pesticides.
Healthy Ingredient Swaps
This recipe embraces a health-conscious approach without sacrificing flavor. For instance, consider using dairy-free cream cheese for a vegan twist, or swap out honey for agave nectar if you prefer a lower glycemic index sweetener. You can also experiment with adding citrus zest, such as lemon or orange, to the filling for an extra layer of flavor that complements the strawberries beautifully.
Serving Suggestions for Strawberry Santas
Strawberry Santas make a delightful addition to any holiday gathering or as a festive dessert for family dinners. Consider plating them on a decorated platter and garnishing with mint leaves for added color and freshness. Pair them with a light sparkling drink to enhance the celebratory feel. These treats are not just desserts; they are a whimsical centerpiece that sparks joy among the guests.
FAQs
What if my cheesecake filling is too thick?
If your filling turns out too thick, you can thin it out by adding a tablespoon of milk or more Greek yogurt, blending until smooth. This adjustment ensures you can easily fill the strawberries without compromising the flavor.
How can I enhance the sweetness of the filling?
Taste the filling before piping it into the strawberries. If you find it less sweet than desired, gradually mix in more honey or maple syrup until it reaches your preferred level of sweetness.
What can I do if there are any fillings leftover?
If you have cheesecake filling leftover, consider using it as a dip for fresh fruit or spreading it on whole-grain toast for a nutritious breakfast treat. It can also be used as a filling for Crepes or even dolloped on top of pancakes.
Can I flavor the cheesecake filling differently?
Absolutely! If you wish to try different flavors, add a tablespoon of cocoa powder for a chocolate twist, or incorporate some crushed berries into the filling for a fruitier version that still complements the strawberries.
What if my Santas don’t stand upright?
If your Santas are unstable, make sure to slice a small piece off the bottom of each strawberry to create a flat surface. This adjustment provides a stable base, ensuring they maintain their shape during presentation.
Can I scale the recipe for a larger party?
Yes! This recipe can easily be multiplied to accommodate more guests. Simply increase the quantities of each ingredient proportionately and ensure you have enough strawberries to create the desired number of Santas.
Conclusion
Creating Strawberry Santas with a healthy cheesecake filling is a fun and interactive way to bring festive flair to your holiday table. Not only are they visually stunning, but they also offer a delicious alternative to heavier desserts without compromising taste.
So gather your ingredients, invite your family into the kitchen, and enjoy the smiles that come from these delightful creations. They are sure to become a seasonal favorite that combines health and happiness in every bite.
Recipe Card
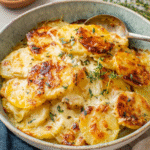
Creamy Cheesy Garlic Scalloped Potatoes Recipe
Ingredients
- 2 lbs russet potatoes
- 2 cups heavy cream
- 4 cloves garlic minced
- 2 cups shredded sharp cheddar cheese
- 1 cup grated Parmesan cheese
- 1 teaspoon salt
- 1/2 teaspoon black pepper
- 1/4 teaspoon nutmeg
- 2 tablespoons fresh parsley chopped
Instructions
- Preheat your oven to 375°F (190°C).
- Prepare the baking dish by greasing it with butter or cooking spray.
- Thinly slice the russet potatoes using a mandoline or sharp knife.
- In a saucepan, combine heavy cream, minced garlic, salt, pepper, and nutmeg. Heat over medium heat until warmed.
- Layer half of the sliced potatoes in the greased baking dish.
- Pour half of the warm cream mixture over the first layer of potatoes.
- Sprinkle half of the cheddar and Parmesan cheese over the cream-covered potatoes.
- Repeat the layering process with the remaining potatoes, cream mixture, and cheeses.
- Cover the baking dish with aluminum foil and bake for 45 minutes.
- Remove the foil and bake for an additional 30 minutes or until the top is golden and bubbly.
- Let the dish rest for 10 minutes before serving, garnished with fresh parsley.
Notes
Additional serving suggestions: pair with a crisp salad, garlic bread, or roasted seasonal vegetables for balance.
For make-ahead, prep components separately and assemble just before heating to preserve texture.
Taste and adjust with acid (lemon/vinegar) and salt right at the end to wake up flavors.


