Introduction
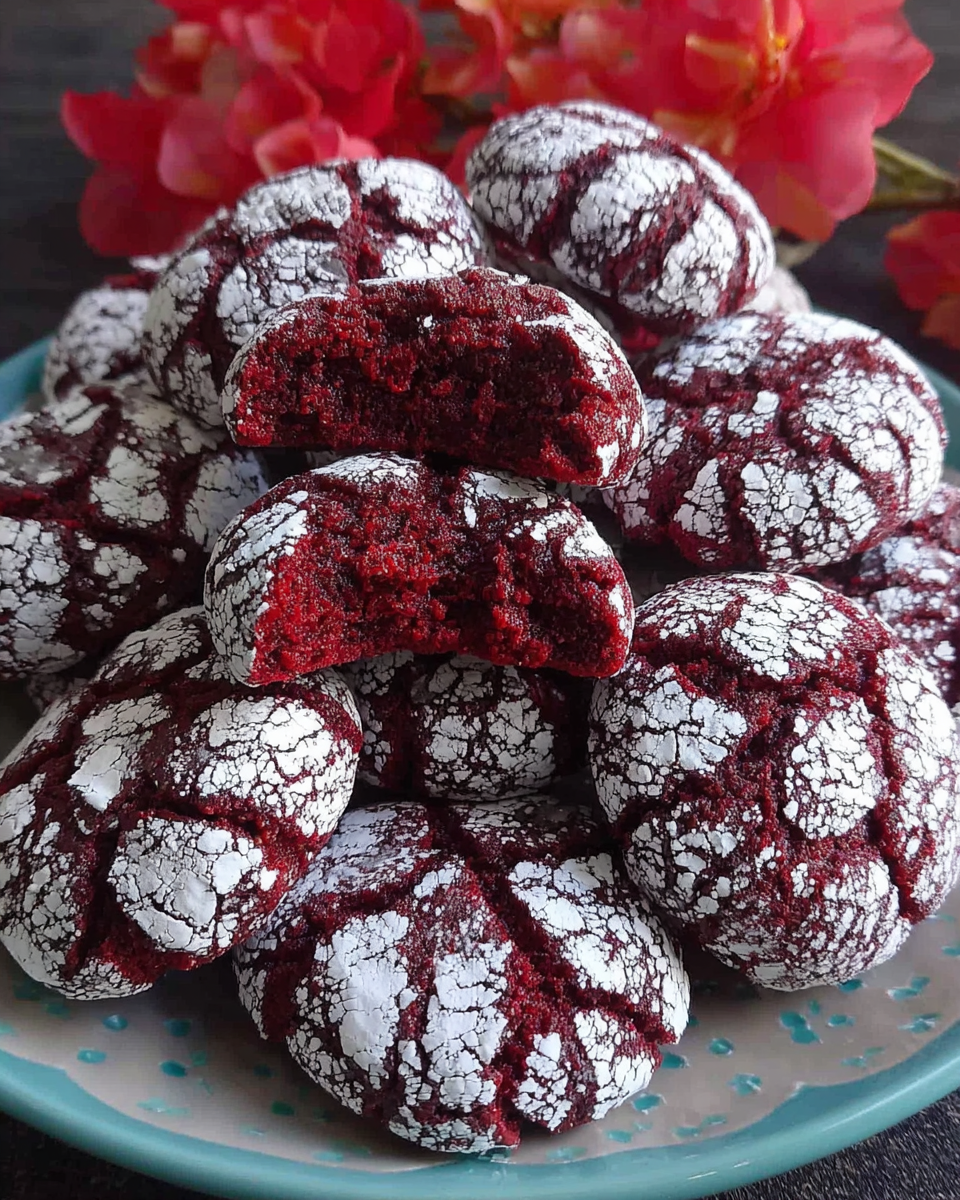
Red Velvet Crinkle Cookies bring a festive charm to any gathering. Their vibrant red color and white powdered sugar coating create an eye-catching treat that tastes as delightful as it looks. These cookies are soft, fudgy, and packed with the classic flavors of red velvet.
The combination of cocoa powder and vanilla gives these cookies a rich flavor that pairs perfectly with a hint of cream cheese. Not only are they pleasing to the palate, but they also elevate your dessert table, making them a favorite during the holiday season or special occasions.
Making these cookies from scratch is not only rewarding but also allows you to fill your home with their delectable aroma. Follow this simple recipe to create a batch of your own, sure to impress friends and family alike.
Ingredients
- 2 cups all-purpose flour
All-purpose flour provides the structure for the cookies. It helps create the soft, chewy texture that is characteristic of a great cookie. - 2 tablespoons unsweetened cocoa powder
Cocoa powder adds the rich chocolate flavor without overpowering the distinctive taste of red velvet. It also contributes to the cookie's beautiful color. - 1 teaspoon baking powder
Baking powder is essential for giving the cookies a nice rise, making them soft and fluffy in the center while forming a crinkly outer layer. - 1/2 teaspoon salt
Salt enhances the flavors of the other ingredients, balancing the sweetness and adding depth to the overall taste of the cookie. - 1/2 cup unsalted butter, softened
Butter not only provides richness and flavor but also contributes to the cookies' tender texture. Softened butter ensures easy incorporation with the other ingredients. - 1 cup granulated sugar
Granulated sugar sweetens the cookies and helps achieve that signature crinkle effect upon baking by creating those delightful textures. - 1/4 cup packed brown sugar
Brown sugar adds moisture and a slight caramel flavor, enriching the cookie's taste and helping maintain its soft texture. - 1 large egg
The egg binds the ingredients together, providing structure and moisture to the cookie dough. - 1 teaspoon vanilla extract
Vanilla extract enhances the overall flavor, adding a subtle sweetness that complements the cocoa and other ingredients. - 1 tablespoon red food coloring
Food coloring is essential for achieving the vibrant red hue associated with red velvet treats. It visually enhances the cookie's appeal. - Powdered sugar for dusting
Powdered sugar gives the cookies a sweet finish and a beautiful appearance, contrasting with their rich red color.
Directions & Preparation
Step 1: Preheat your oven to 350°F (175°C).
Preheating your oven is a critical step for baking. It ensures that cookies bake evenly and achieve the desired texture. If the oven isn’t at the right temperature when you put the cookies in, they may spread too much or not rise properly, affecting their final appearance and taste.
Step 2: In a medium bowl, whisk together the flour, cocoa powder, baking powder, and salt.
This step is vital for evenly distributing the dry ingredients, which helps prevent clumping. Whisking also aerates the mixture, ensuring your cookies have a lighter texture. Incorporating these dry ingredients first prepares them to blend seamlessly with the wet ingredients, making for a smoother dough.
Step 3: In a large bowl, beat the softened butter, granulated sugar, and brown sugar until light and fluffy.
Creaming the butter and sugars together is an essential technique that introduces air into the mixture, creating a light texture in the cookies. This process helps to dissolve the sugars, which not only sweetens the dough but also contributes to the cookie's structure and overall mouthfeel.
Step 4: Add the egg, vanilla extract, and red food coloring to the butter mixture and mix well.
Incorporating the egg and vanilla at this stage adds moistness and flavor. The food coloring should be mixed in thoroughly to achieve an even distribution of color, ensuring every bite of the cookie showcases that signature red hue.
Step 5: Gradually add the dry ingredients to the wet ingredients, mixing until just combined.
It’s important to mix only until combined to prevent the gluten in the flour from developing too much, which can make the cookies tough. This gentle combining ensures a tender, chewy texture in the final product.
Step 6: Cover the bowl with plastic wrap and chill the dough in the refrigerator for at least 30 minutes.
Chilling the dough helps solidify the fats, which can prevent the cookies from spreading too much during baking. This step is crucial for achieving the desired crinkly appearance and ensures a fudgier center.
Step 7: Scoop tablespoons of dough and roll them into balls, then roll each ball in powdered sugar until fully coated.
Rolling the dough into balls and coating them in powdered sugar creates that crinkle effect as they bake and helps form the beautiful, distinct texture. This visual contrast is what makes red velvet crinkle cookies so appealing.
Step 8: Place the sugared dough balls spaced on a parchment-lined baking sheet.
Spacing the dough balls appropriately allows for even baking and prevents them from merging together. Using parchment paper also provides a non-stick surface, ensuring easy removal once baked.
Step 9: Bake in the preheated oven for 10-12 minutes, or until the edges look set.
Monitoring the cookies while they bake is essential for preventing overbaking. The cookies will continue to firm up as they cool, so it’s better to err on the side of slightly underbaking. The edges should look set, while the centers remain soft and fudgy.
Step 10: Remove from oven and let them cool on the baking sheet for 5 minutes before transferring to a wire rack.
Letting the cookies cool slightly on the baking sheet allows them to firm up so they don’t fall apart when transferred. This step is crucial for maintaining their delicate structure and ensures they arrive at your table intact.

The Story Behind Red Velvet Cookies
Red velvet cake, with its striking color and subtle cocoa flavor, has roots in Southern cuisine. The dessert symbolizes celebration and is popular in festive settings, inspiring adaptations like red velvet cookies. This version keeps the spirit of the traditional dessert while introducing a fun and portable treat. Their vibrant hue and rich taste make them a perfect addition to holiday gatherings.
Tailoring Your Red Velvet Cookies
Feel free to customize your red velvet crinkle cookies. Consider adding white chocolate chips or chopped nuts for added texture and flavor. You can also experiment with different types of cocoa powder—dark cocoa can enhance the chocolate flavor even further, while adding a hint of espresso powder could accentuate the red velvet’s richness. Enhancing this recipe can transform your cookies into something uniquely yours.
Serving Suggestions for a Festive Presentation
Pair your red velvet crinkle cookies with a tall glass of cold milk or rich hot cocoa for a delightful treat. For a festive touch, arrange them on a decorative plate and dust with additional powdered sugar just before serving. You could also serve them alongside cream cheese frosting for dipping, enhancing the classic flavors of red velvet and making your dessert table even more enticing.
FAQs
What should I do if my cookie dough is too sticky?
If your dough is too sticky to handle, try chilling it in the refrigerator for a longer period, which will firm it up. If necessary, you can also add a sprinkle of flour while mixing, but do so gradually.
Can I use liquid food coloring instead of gel for a deeper red color?
Gel food coloring is recommended as it provides a more intense color without adding extra moisture. Liquid food coloring can alter the dough's consistency.
What happens if I overbake the cookies?
If overbaked, the cookies will become dry and lose their fudginess. Keep an eye on them towards the end of the baking time to avoid this.
Can I substitute coconut sugar for brown sugar?
Coconut sugar can be used as a substitute for brown sugar, but it will slightly change the flavor and color of the cookies. Adjustments may be needed in terms of texture.
Why did my cookies not crinkle properly?
Lack of crinkles may be due to either overmixing the dough or insufficient chilling before baking. Both steps are crucial for achieving the characteristic cracks.
How can I enhance the flavor if I find it too sweet?
If the cookies are too sweet, you can reduce the sugar slightly or add a dash of espresso powder to balance out the sweetness.
Conclusion
Red Velvet Crinkle Cookies are a delightful treat that embodies both taste and festivity. With their rich flavor and stunning appearance, they’re sure to be a hit at any gathering.
By following these simple steps and tips, you can create a batch that is sure to impress both yourself and your guests. Don’t hesitate to make these cookies your own by experimenting with flavors or adding personal touches.
Recipe Card
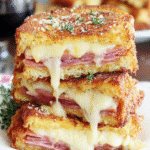
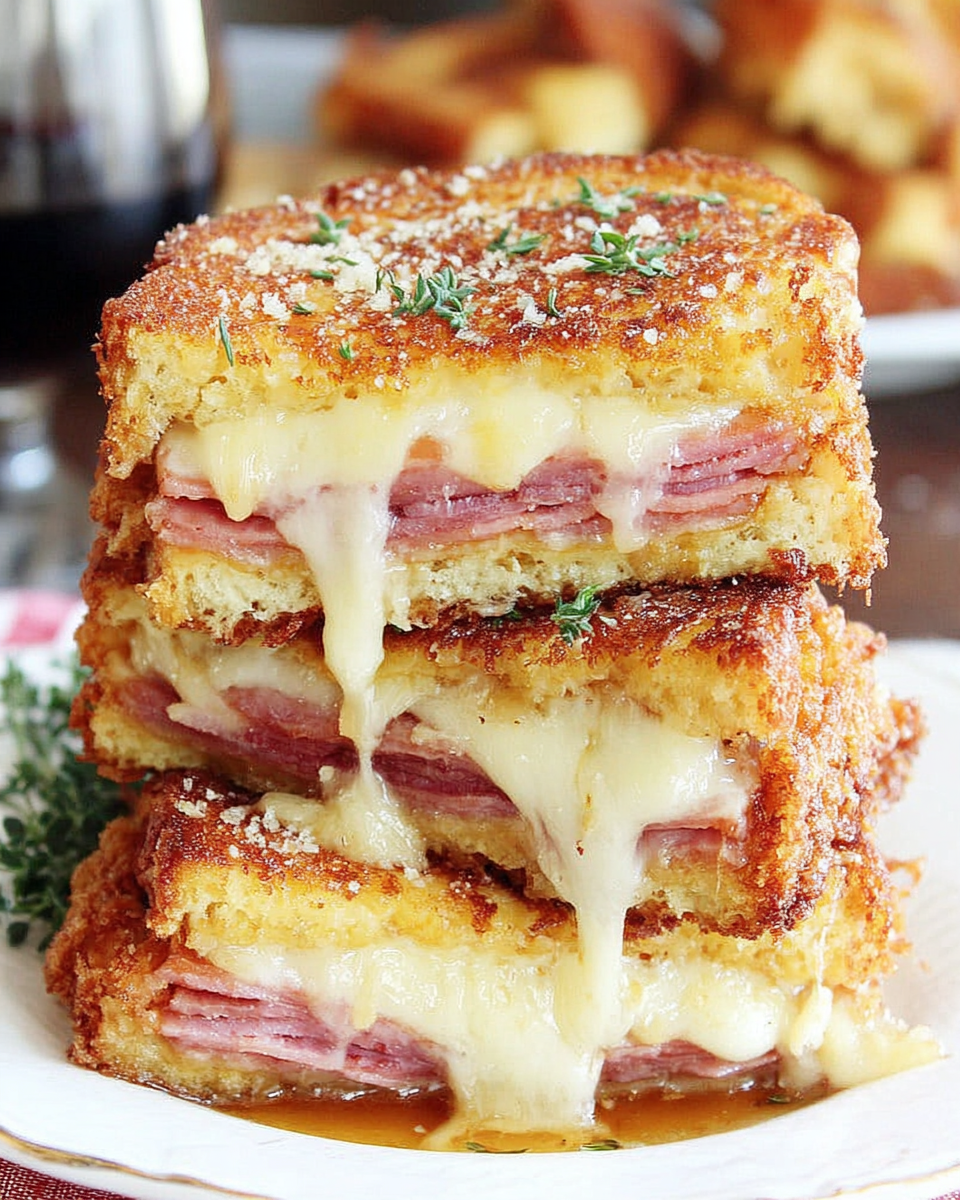
Savory Monte Cristo Sandwich Simple & Delicious
Ingredients
- 8 slices of bread
- 4 slices of deli ham
- 4 slices of deli turkey
- 4 slices of Swiss cheese
- 4 large eggs
- 1/4 cup milk
- 1 teaspoon Dijon mustard
- Salt and pepper to taste
- Butter for grilling
Instructions
- Gather all your ingredients and work area.
- In a medium bowl, whisk together eggs, milk, Dijon mustard, salt, and pepper until fully combined.
- Lay out four slices of bread and layer two slices each of ham and turkey on top, followed by a slice of Swiss cheese.
- Top the sandwiches with the remaining slices of bread, forming four complete sandwiches.
- Heat a skillet over medium heat and add a tablespoon of butter.
- Dip each sandwich into the egg mixture, ensuring both sides are well-coated before placing them in the skillet.
- Cook each sandwich for 3-4 minutes on each side until golden brown and the cheese is melted.
- Transfer the finished sandwiches to a plate and keep warm while you repeat with the remaining sandwiches.
- Slice the sandwiches in half and serve immediately, optionally with a sprinkle of powdered sugar or a side of your favorite dipping sauce.
Notes
Additional serving suggestions: pair with a crisp salad, garlic bread, or roasted seasonal vegetables for balance.
For make-ahead, prep components separately and assemble just before heating to preserve texture.
Taste and adjust with acid (lemon/vinegar) and salt right at the end to wake up flavors.