Introduction
If you're looking to elevate your dinner table experience, mouthwatering dinner rolls can make a significant difference. Using frozen bread dough opens up endless possibilities, offering a convenient way to achieve soft and fluffy rolls that everyone will love. These rolls are not only easy to prepare but also deliver on taste, making them perfect for any meal, whether it's a casual family dinner or a special gathering.
The beauty of frozen bread dough lies in its accessibility and versatility. You can customize these rolls with herbs, cheese, or even a sweet touch, depending on your preference. Preparing these rolls can be both an enjoyable and rewarding experience, as the delightful aroma fills your kitchen and captures the hearts of your loved ones.
Ingredients
- 1 package (about 16 oz) frozen bread dough
Frozen bread dough is the base of this recipe, providing the perfect texture and flavor for dinner rolls. It's pre-fermented, allowing for an easy rise and better overall quality. - 1/4 cup unsalted butter, melted
Butter adds richness and moisture to the dough, enhancing the flavor and tenderness of the rolls. Brushing it on before baking gives the rolls a beautiful golden crust. - 1 teaspoon garlic powder
This adds a subtle garlic flavor that complements the rolls beautifully. Garlic powder is an easy way to infuse flavor without the need for fresh ingredients. - 1 teaspoon dried oregano
Oregano contributes a warm, earthy taste, making the rolls more aromatic and flavorful. It pairs well with the garlic and adds a hint of Mediterranean flair. - 1/2 teaspoon salt
Salt is crucial for enhancing the overall flavor of the rolls. It balances the sweetness of the dough and ensures a savory taste. - 1/4 cup grated parmesan cheese (optional)
Parmesan cheese adds a nutty and savory element to the rolls, elevating their taste profile. It's optional but highly recommended for a gourmet touch.
Directions & Preparation
Step 1: Thaw the frozen bread dough overnight in the refrigerator or on the counter at room temperature for about 2-3 hours.
This step is essential because it allows the dough to defrost evenly, making it easier to work with and ensuring it rises properly during the second fermentation.
Step 2: Preheat your oven to 375°F (190°C).
Preheating the oven is crucial for achieving the perfect baking environment. A hot oven helps the rolls rise rapidly during the initial baking phase, leading to fluffy and airy rolls.
Step 3: Grease a baking dish or line it with parchment paper for easy removal.
Properly greasing the baking dish prevents the rolls from sticking, allowing for easy removal once they are baked. This helps maintain the rolls’ structure and presentation.
Step 4: Once the dough is thawed, divide it into 12 equal pieces and shape each piece into a ball.
Dividing the dough ensures that each roll is uniform in size, which allows for even baking. Shaping the dough into balls helps create surface tension, leading to nicely rounded rolls.
Step 5: Place the dough balls in the prepared baking dish, allowing space between them for rising.
Arranging the rolls with space allows them to expand while rising and baking, preventing them from becoming too dense or merging into one another.
Step 6: Cover with a clean kitchen towel and let rise in a warm area for 30-45 minutes or until doubled in size.
This second rise is critical for developing the rolls' texture. A warm environment encourages yeast activity, which leads to a light and airy roll.
Step 7: Mix the melted butter, garlic powder, oregano, and salt in a small bowl.
Combining these ingredients creates a delicious topping that infuses flavor into the rolls. Brushing this mixture enhances aroma and taste while adding a nice glossy finish.
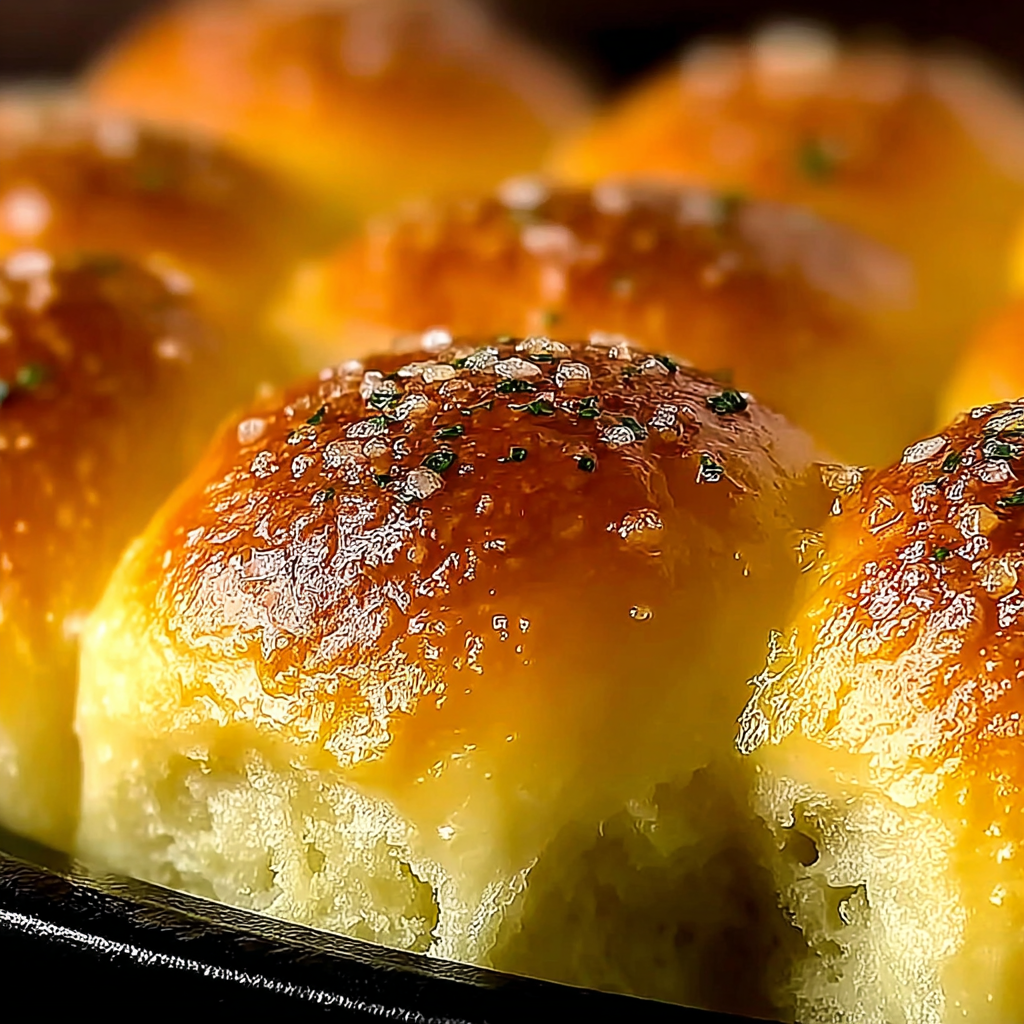
Step 8: After the dough has risen, brush the garlic butter mixture generously over the rolls before baking.
Brushing the rolls not only enhances their flavor but also helps achieve a beautiful golden color on the crust as they bake. This step contributes significantly to the overall appeal.
Step 9: Optional: Sprinkle grated parmesan cheese on top for added flavor and texture.
The cheese provides a savory depth and a delightful crunch to the rolls, intensifying their flavor profile. It's a simple addition that can transform the dish from ordinary to extraordinary.
Step 10: Bake in the preheated oven for 15-20 minutes or until golden brown.
Baking until golden brown signals that the rolls are fully cooked and have developed a nice crust. Keep an eye on them to avoid over-baking, which can lead to dryness.
Step 11: Allow the rolls to cool for a few minutes before serving.
Letting the rolls cool slightly enhances their flavor and texture. This short resting period allows for better slicing and a more pleasant eating experience.

Customizing Your Dinner Rolls
One of the best aspects of using frozen bread dough is the ease with which you can customize your dinner rolls. Add fresh herbs like rosemary or thyme for an aromatic touch, or introduce spices like paprika for a hint of warmth. For a sweet twist, consider incorporating cinnamon and sugar or even a fruit preserve in the center of the rolls before baking. The possibilities are endless!
The Science Behind the Rise
Understanding the fermentation process is key to perfect dinner rolls. The yeast in the dough ferments the sugars, producing carbon dioxide that causes the dough to expand. This process not only lightens the rolls but also develops flavor. Ensuring your kitchen is warm during the rising phase will optimize yeast activity and yield rolls that are fluffy and delicious.
Serving Suggestions for Your Rolls
These dinner rolls are incredibly versatile and can complement a variety of dishes. Serve them alongside a hearty soup or stew for a satisfying meal, or pair them with roasted meats for a classic dinner experience. You can also slice them open and fill them with your favorite sandwich ingredients for a delightful lunch option, showcasing their adaptability.
FAQs
What if my rolls don't rise enough?
If the rolls don’t rise adequately, ensure that your dough is in a warm environment as yeast thrives in warmth. If necessary, allow for extra rising time.
Can I make these rolls in advance and freeze them?
Yes, you can prepare the rolls up to the point of baking, then freeze them on a baking sheet. Once frozen, transfer them to a bag, and bake them straight from the freezer when ready.
How can I make these rolls sweeter?
To add sweetness, consider incorporating sugar into the dough or brushing the baked rolls with a honey or maple syrup glaze.
What might happen if my dough is too sticky?
If the dough feels sticky, dust your hands and the work surface with a bit of flour while shaping the rolls. This will help manage the stickiness without compromising the dough's hydration.
Can I substitute the butter with olive oil?
Yes, olive oil can replace butter in this recipe, offering a different flavor profile and making it dairy-free.
What if my rolls are too dense?
If your rolls turn out dense, it may be due to overworking the dough or insufficient rising time. Ensure to gently handle the dough during shaping and check for adequate fermentation.
Conclusion
Making mouthwatering dinner rolls from frozen bread dough combines ease and deliciousness, transforming your mealtime experience. With just a few simple steps and ingredients, you can create rolls that will impress your family and friends.
Experiment with flavors and toppings to find your favorite combination, and enjoy the satisfaction of serving warm, homemade rolls that perfectly complement your meal. These rolls are sure to become a staple in your household.
Recipe Card
Notes
Additional serving suggestions: pair with a crisp salad, garlic bread, or roasted seasonal vegetables for balance.
For make-ahead, prep components separately and assemble just before heating to preserve texture.
Taste and adjust with acid (lemon/vinegar) and salt right at the end to wake up flavors.


