Introduction
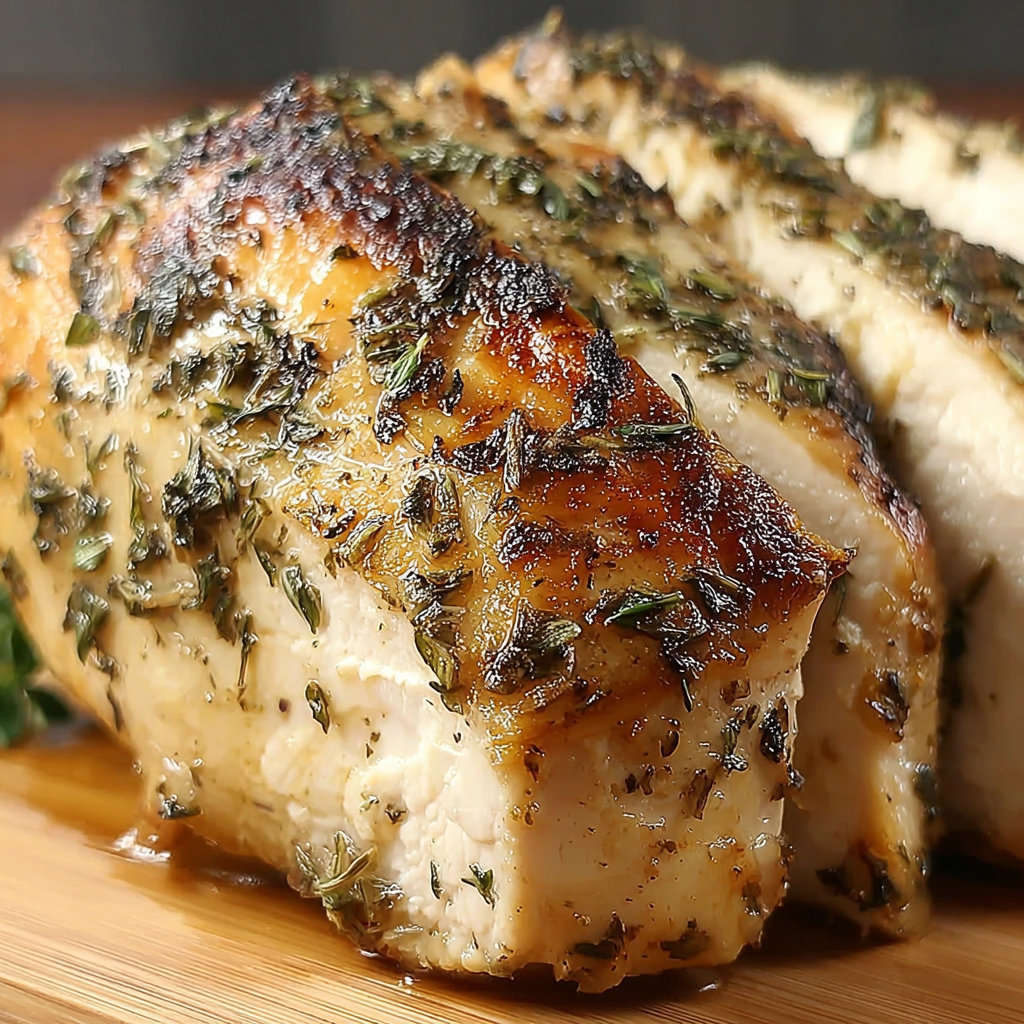
The warmth of roasted turkey permeates any home, especially during the cooler months. Using a Dutch oven to create this herb-infused turkey elevates the experience, turning a simple meal into a culinary delight. The method not only ensures even cooking but also locks in moisture, resulting in tender and flavorful meat.
This recipe incorporates fresh herbs and aromatic vegetables, enveloping the turkey in a bouquet of flavors. Perfect for a family gathering or an intimate dinner, the dish brings the essence of a traditional roast to your kitchen without unnecessary complexity. Let’s dive into making an Herb Dutch Oven Turkey that’s sure to impress.
Ingredients
- 1 (12-14 pounds) whole turkey, thawed
- 1/2 cup unsalted butter, softened
- 4 cloves garlic, minced
- 2 tablespoons fresh rosemary, chopped
- 2 tablespoons fresh thyme, chopped
- 2 tablespoons fresh sage, chopped
- 2 teaspoons salt
- 1 teaspoon black pepper
- 1 onion, quartered
- 2 carrots, chopped
- 2 celery stalks, chopped
- 4 cups low-sodium chicken broth
- 1 lemon, halved
Directions & Preparation
- Preheat the oven to 325°F (165°C).
- Pat the turkey dry with paper towels and place it in a large clean space, such as a cutting board.
- In a medium bowl, combine the softened butter, minced garlic, rosemary, thyme, sage, salt, and black pepper to make a herb butter.
- Gently loosen the skin of the turkey over the breast area and thighs. Use your fingers to spread the herb butter evenly under the skin. Rub any remaining butter all over the outside of the turkey.
- Stuff the cavity of the turkey with the quartered onion, chopped carrots, chopped celery, and halved lemon.
- Place the turkey in the Dutch oven, breast side up. Pour the chicken broth around the turkey, ensuring it does not wash away the herb butter.
- Cover the Dutch oven with its lid and roast in the preheated oven for about 2 1/2 to 3 hours, or until the internal temperature reaches 165°F (75°C) in the thickest part of the breast and thigh.
- About 30 minutes before the turkey is done, remove the lid to allow the skin to brown and crisp up.
- Once cooked, carefully remove the turkey from the Dutch oven and let it rest for at least 20 minutes before carving. Use the pan juices to make a flavorful gravy, if desired.

FAQs
What if my turkey is larger than 14 pounds?
For larger turkeys, increase the cooking time; plan for about 13-15 minutes per pound.
How can I fix a turkey that is too dry?
If overcooked, serve with gravy made from the pan juices to add moisture and flavor.
Can I use dried herbs instead of fresh?
Yes, use a ratio of 1:3; for every tablespoon of fresh herbs, use one teaspoon of dried herbs.
What if I want to add more vegetables?
Feel free to add potatoes, parsnips, or any root vegetables to the Dutch oven for extra flavor and nutrition.
Can I cook this turkey at a higher temperature?
Avoid cooking at higher temperatures to ensure even cooking and prevent dryness.
How can I ensure the turkey cooks evenly?
Be sure to let your turkey rest at room temperature for an hour before cooking, allowing for even cooking throughout.
What if I don’t have a Dutch oven?
You can use any large roasting pan with high sides covered with aluminum foil, but cooking times may vary.
Is it necessary to brine the turkey beforehand?
Brining is optional, but it can enhance the flavor and juiciness of the turkey as well.
Conclusion
Cooking an Herb Dutch Oven Turkey is a rewarding culinary experience that not only fills your home with savory aromas but also brings loved ones together around the dinner table. Every bite reflects the effort and care you put into crafting this dish.
Whether for a holiday or a weekend family gathering, this recipe is sure to be a standout. Embrace the joy of cooking and savor the delicious flavors that emerge from this simple yet sophisticated preparation.
Recipe Card
Notes
Additional serving suggestions: pair with a crisp salad, garlic bread, or roasted seasonal vegetables for balance.
For make-ahead, prep components separately and assemble just before heating to preserve texture.
Taste and adjust with acid (lemon/vinegar) and salt right at the end to wake up flavors.


